

What is App Center?
Apollo App Center is a one stop dashboard where Apollo tenants can browse SDKs that are published by different publishers. Tenants can thereafter subscribe to an SDK, register their applications, setup necessary auth configs & begin using various features that the published SDKs have on offer, in their mobile applications.
Android SDK consumption via App Center
- Login to App Center once you receive an email saying it’s successfully been provisioned for you
Step 1: Project Creation
- Once you land on app center, Click “Create a Project”
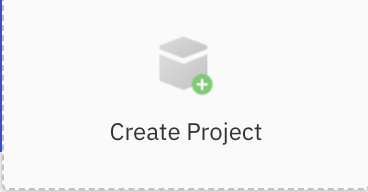
- A project represents a collection of apps created by a tenant.
- Example - If a tenant has two different mobile applications. Eg: a benefits app and a merchant app; the suggested approach is to create two projects - Benefits App & Merchant App.
- Create a project in App Center by entering the following details :
| Field | Description |
|---|---|
| Project name | The name of the project |
| Project key | A unique key for the project (eg : bpInd) |
| Project key | A unique key for the project (eg : bpInd) |
| Repo key | A unique identifier for the repository (eg : bpInd) |
| Description | A description for the project |
| Upload icon | Add an icon for the project |
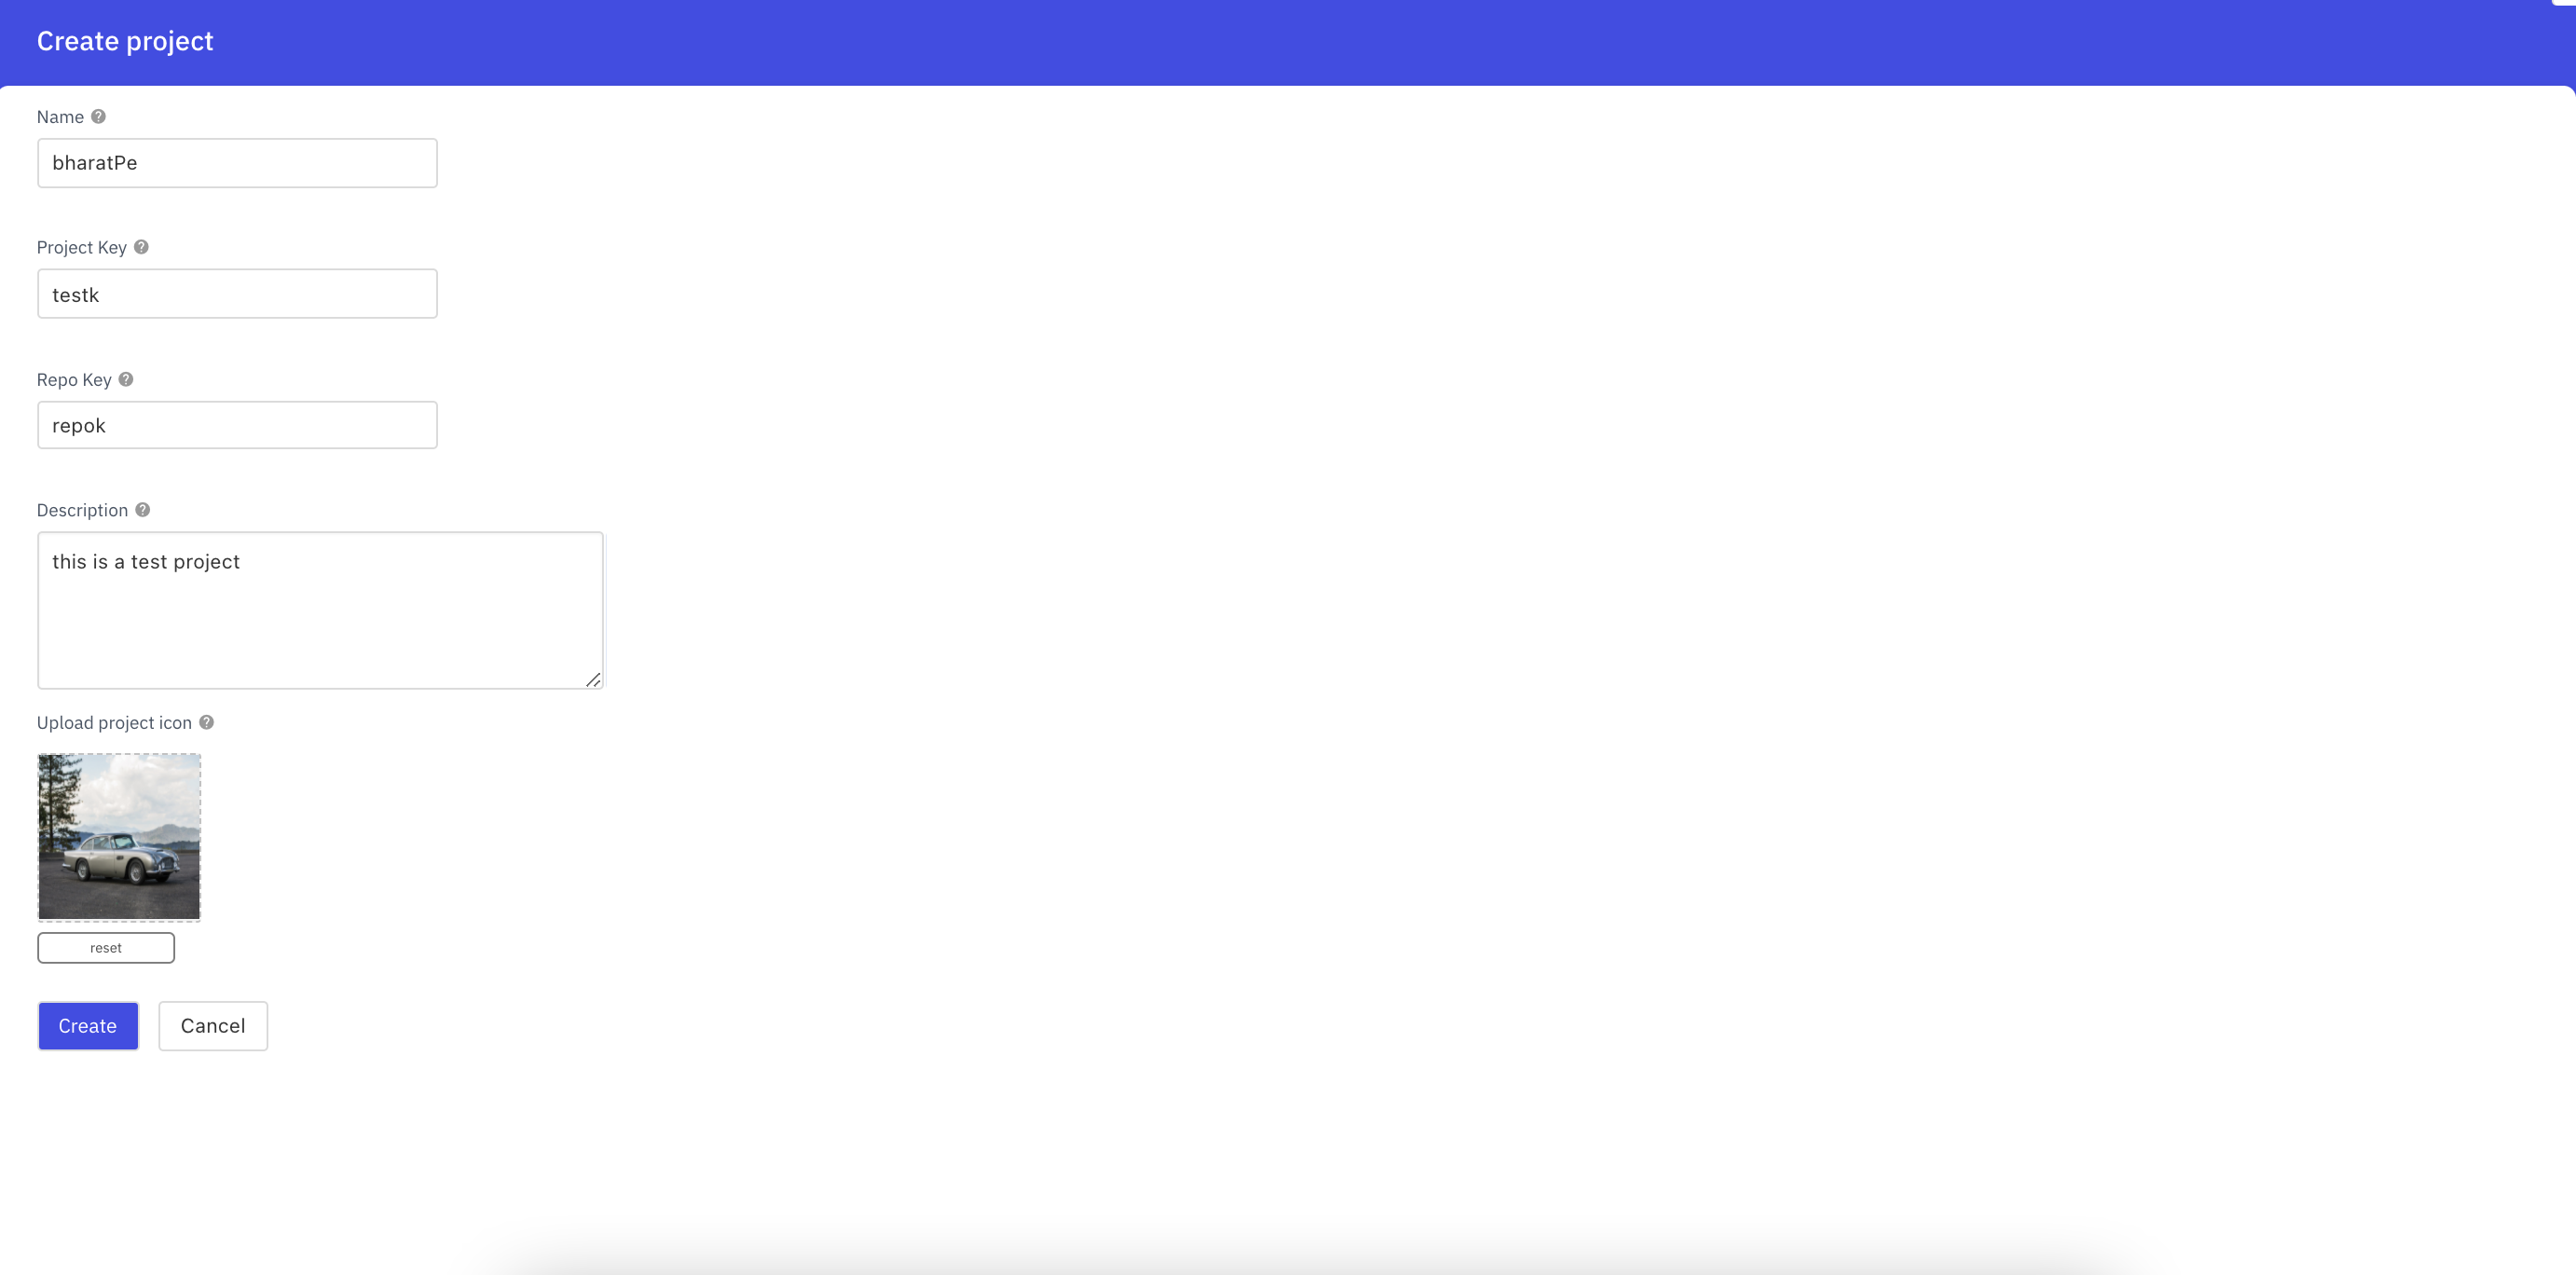
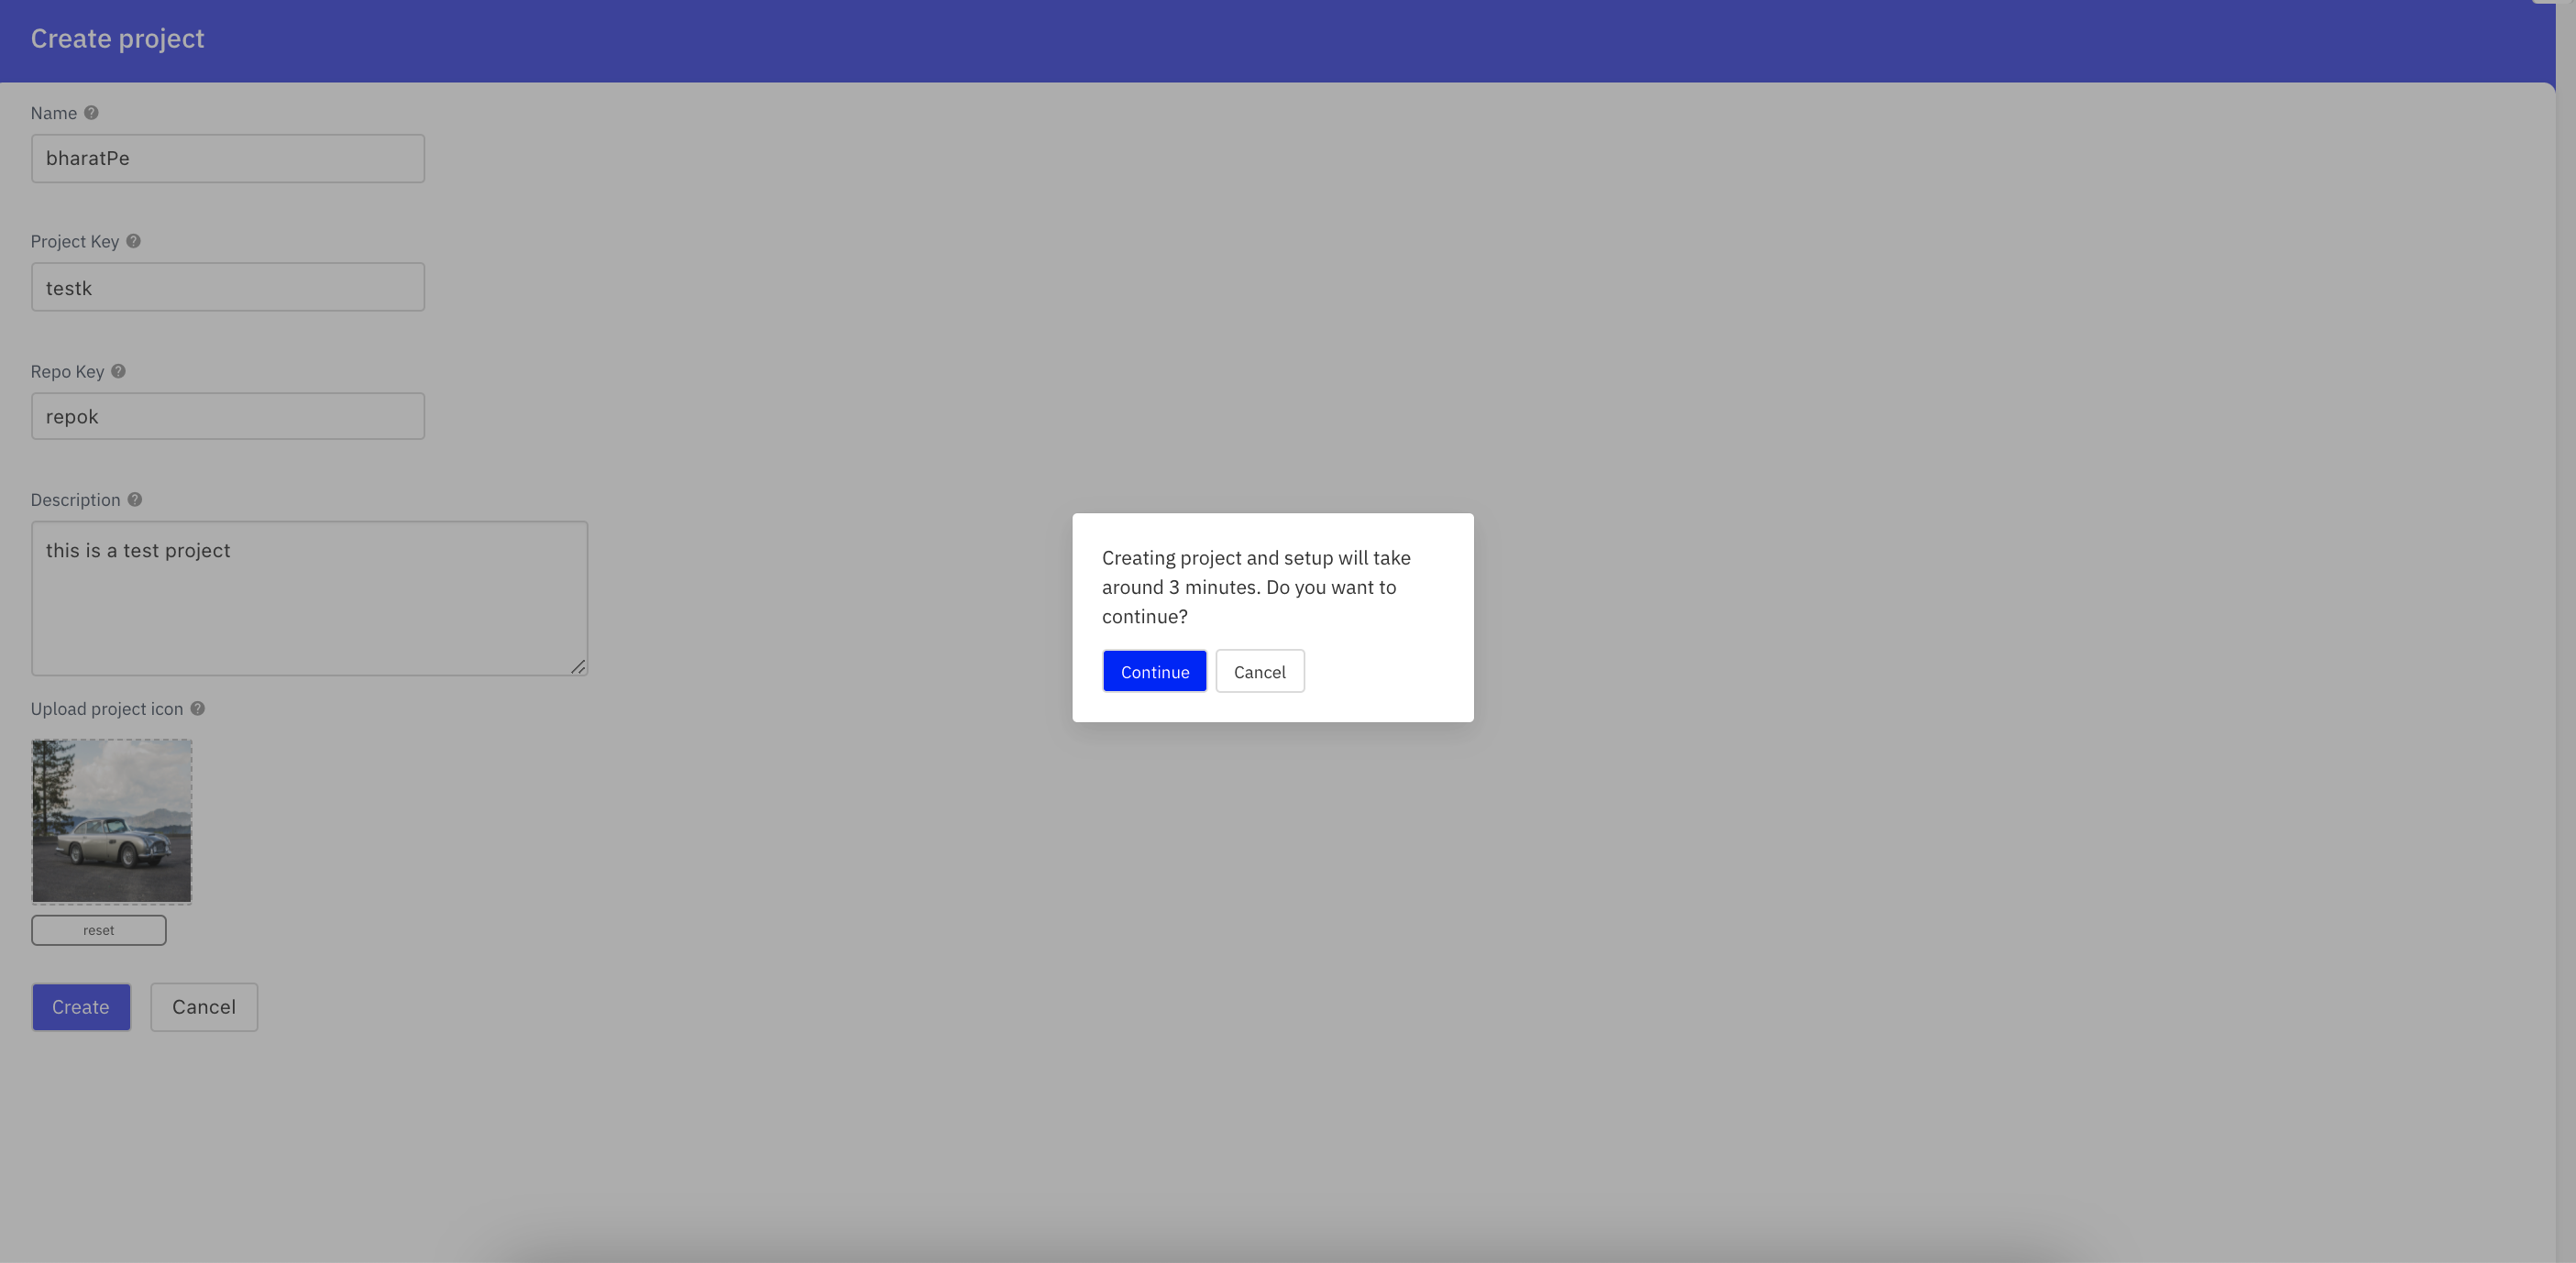
- Click “Create” & “Continue” & wait for the 3 minute timer to complete for project creation.

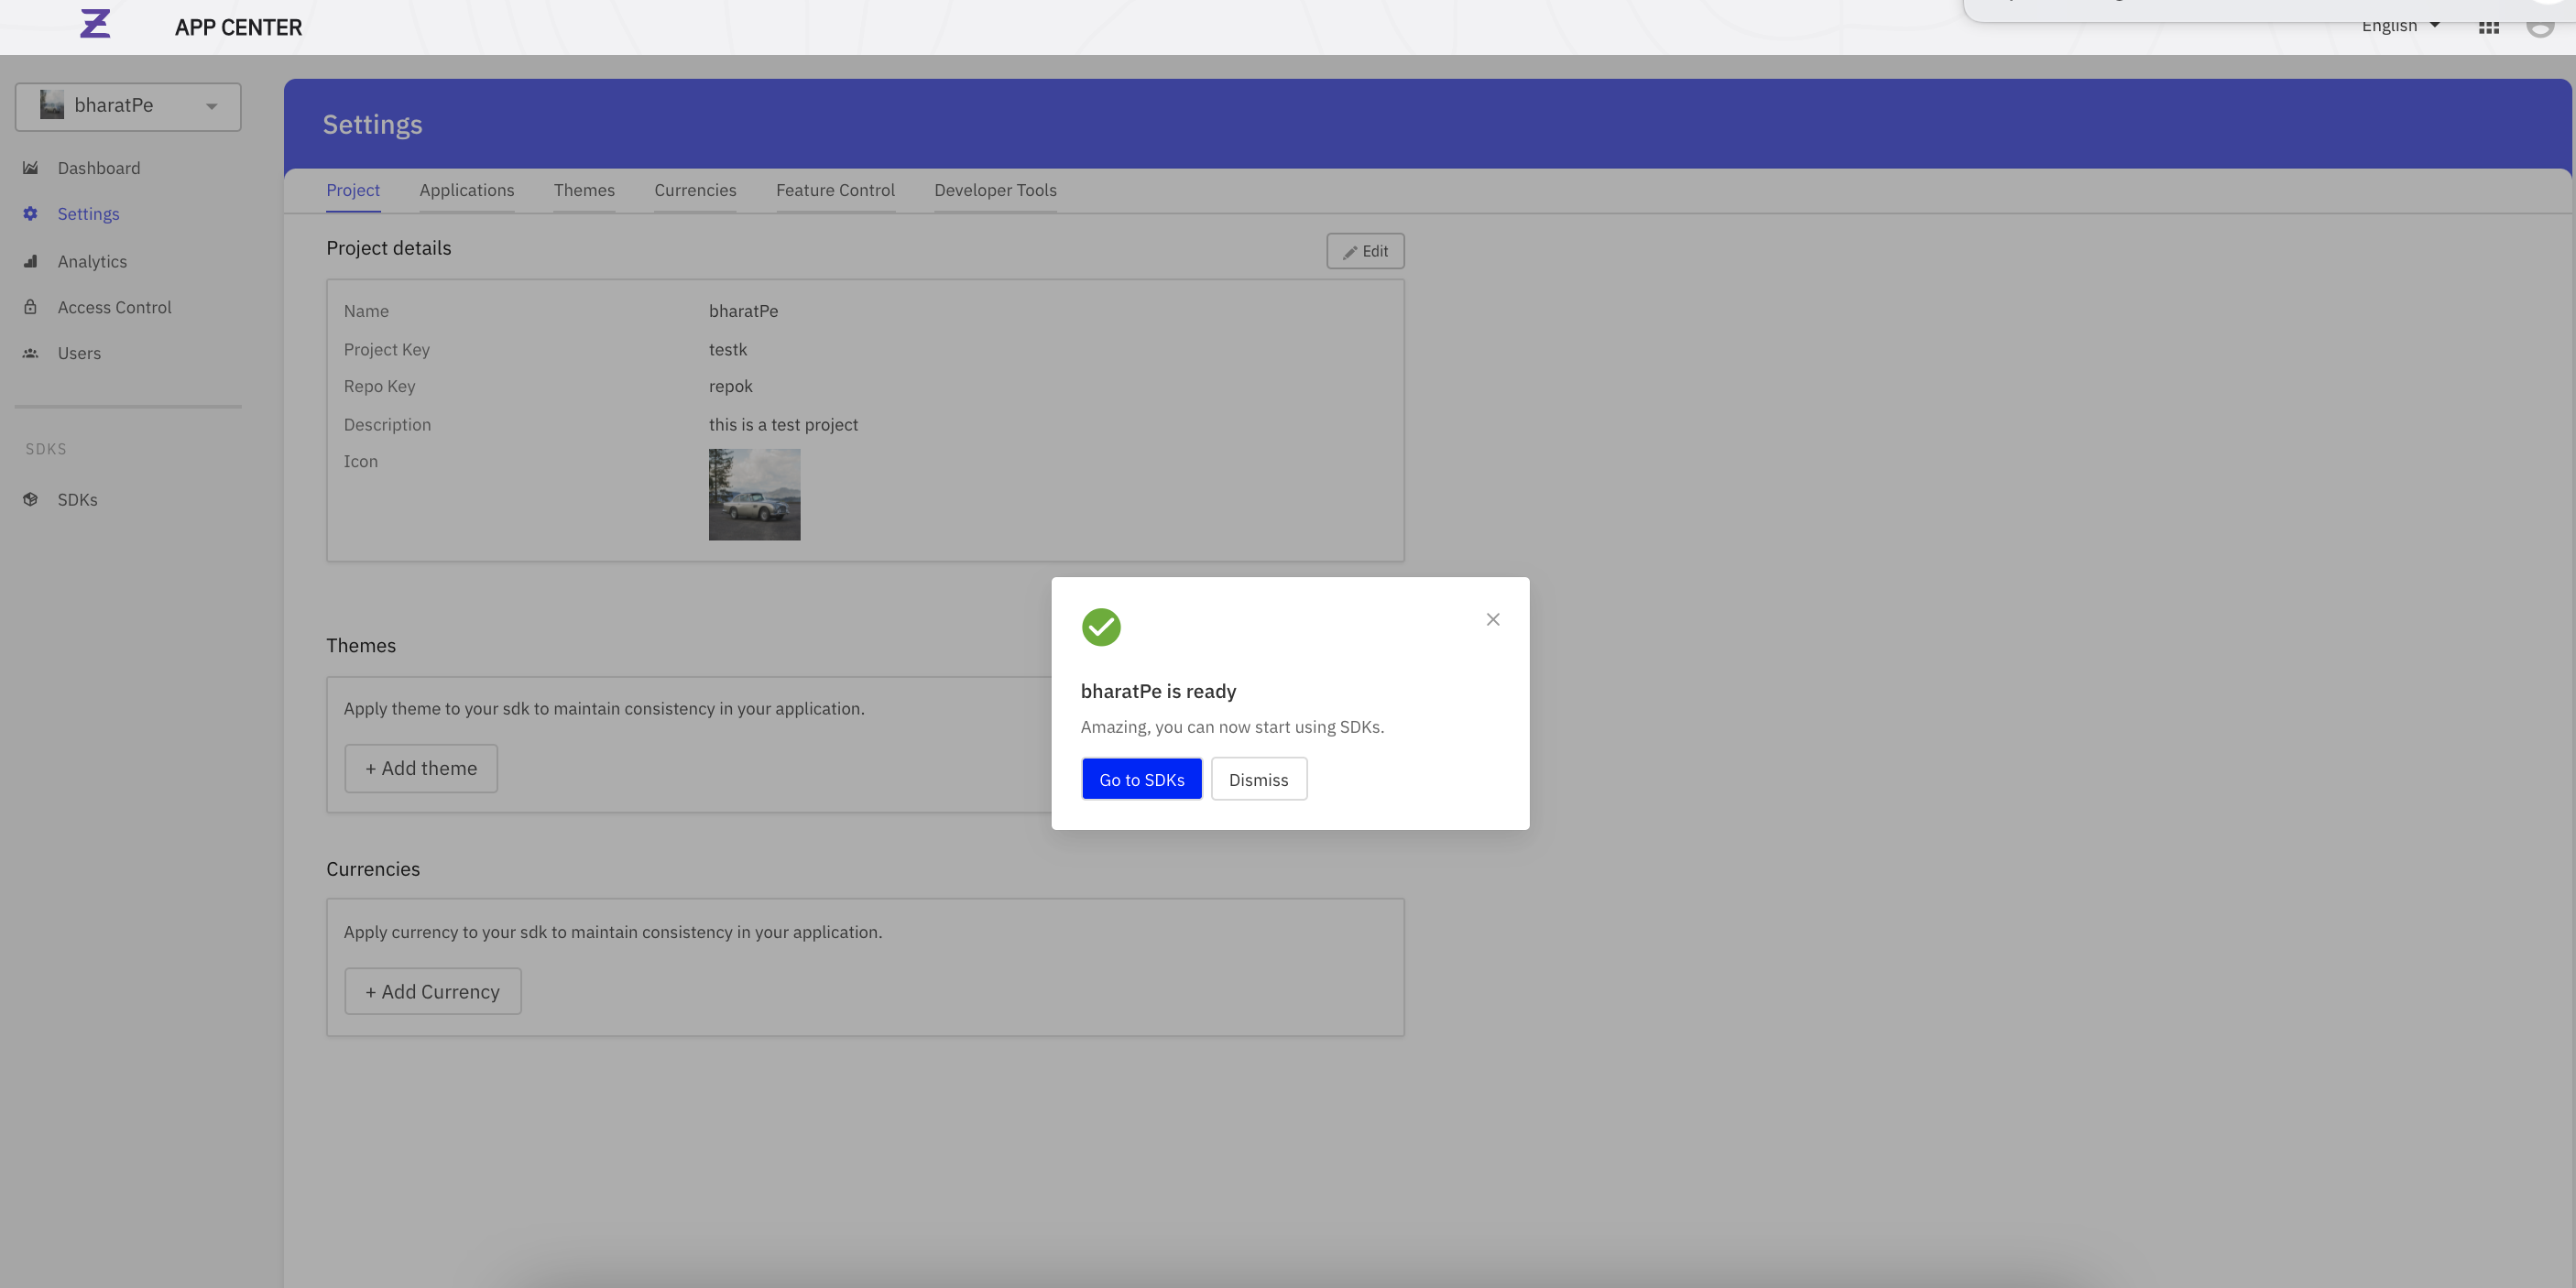
- Once the timer completes, click “Go to SDKs” on the prompt.
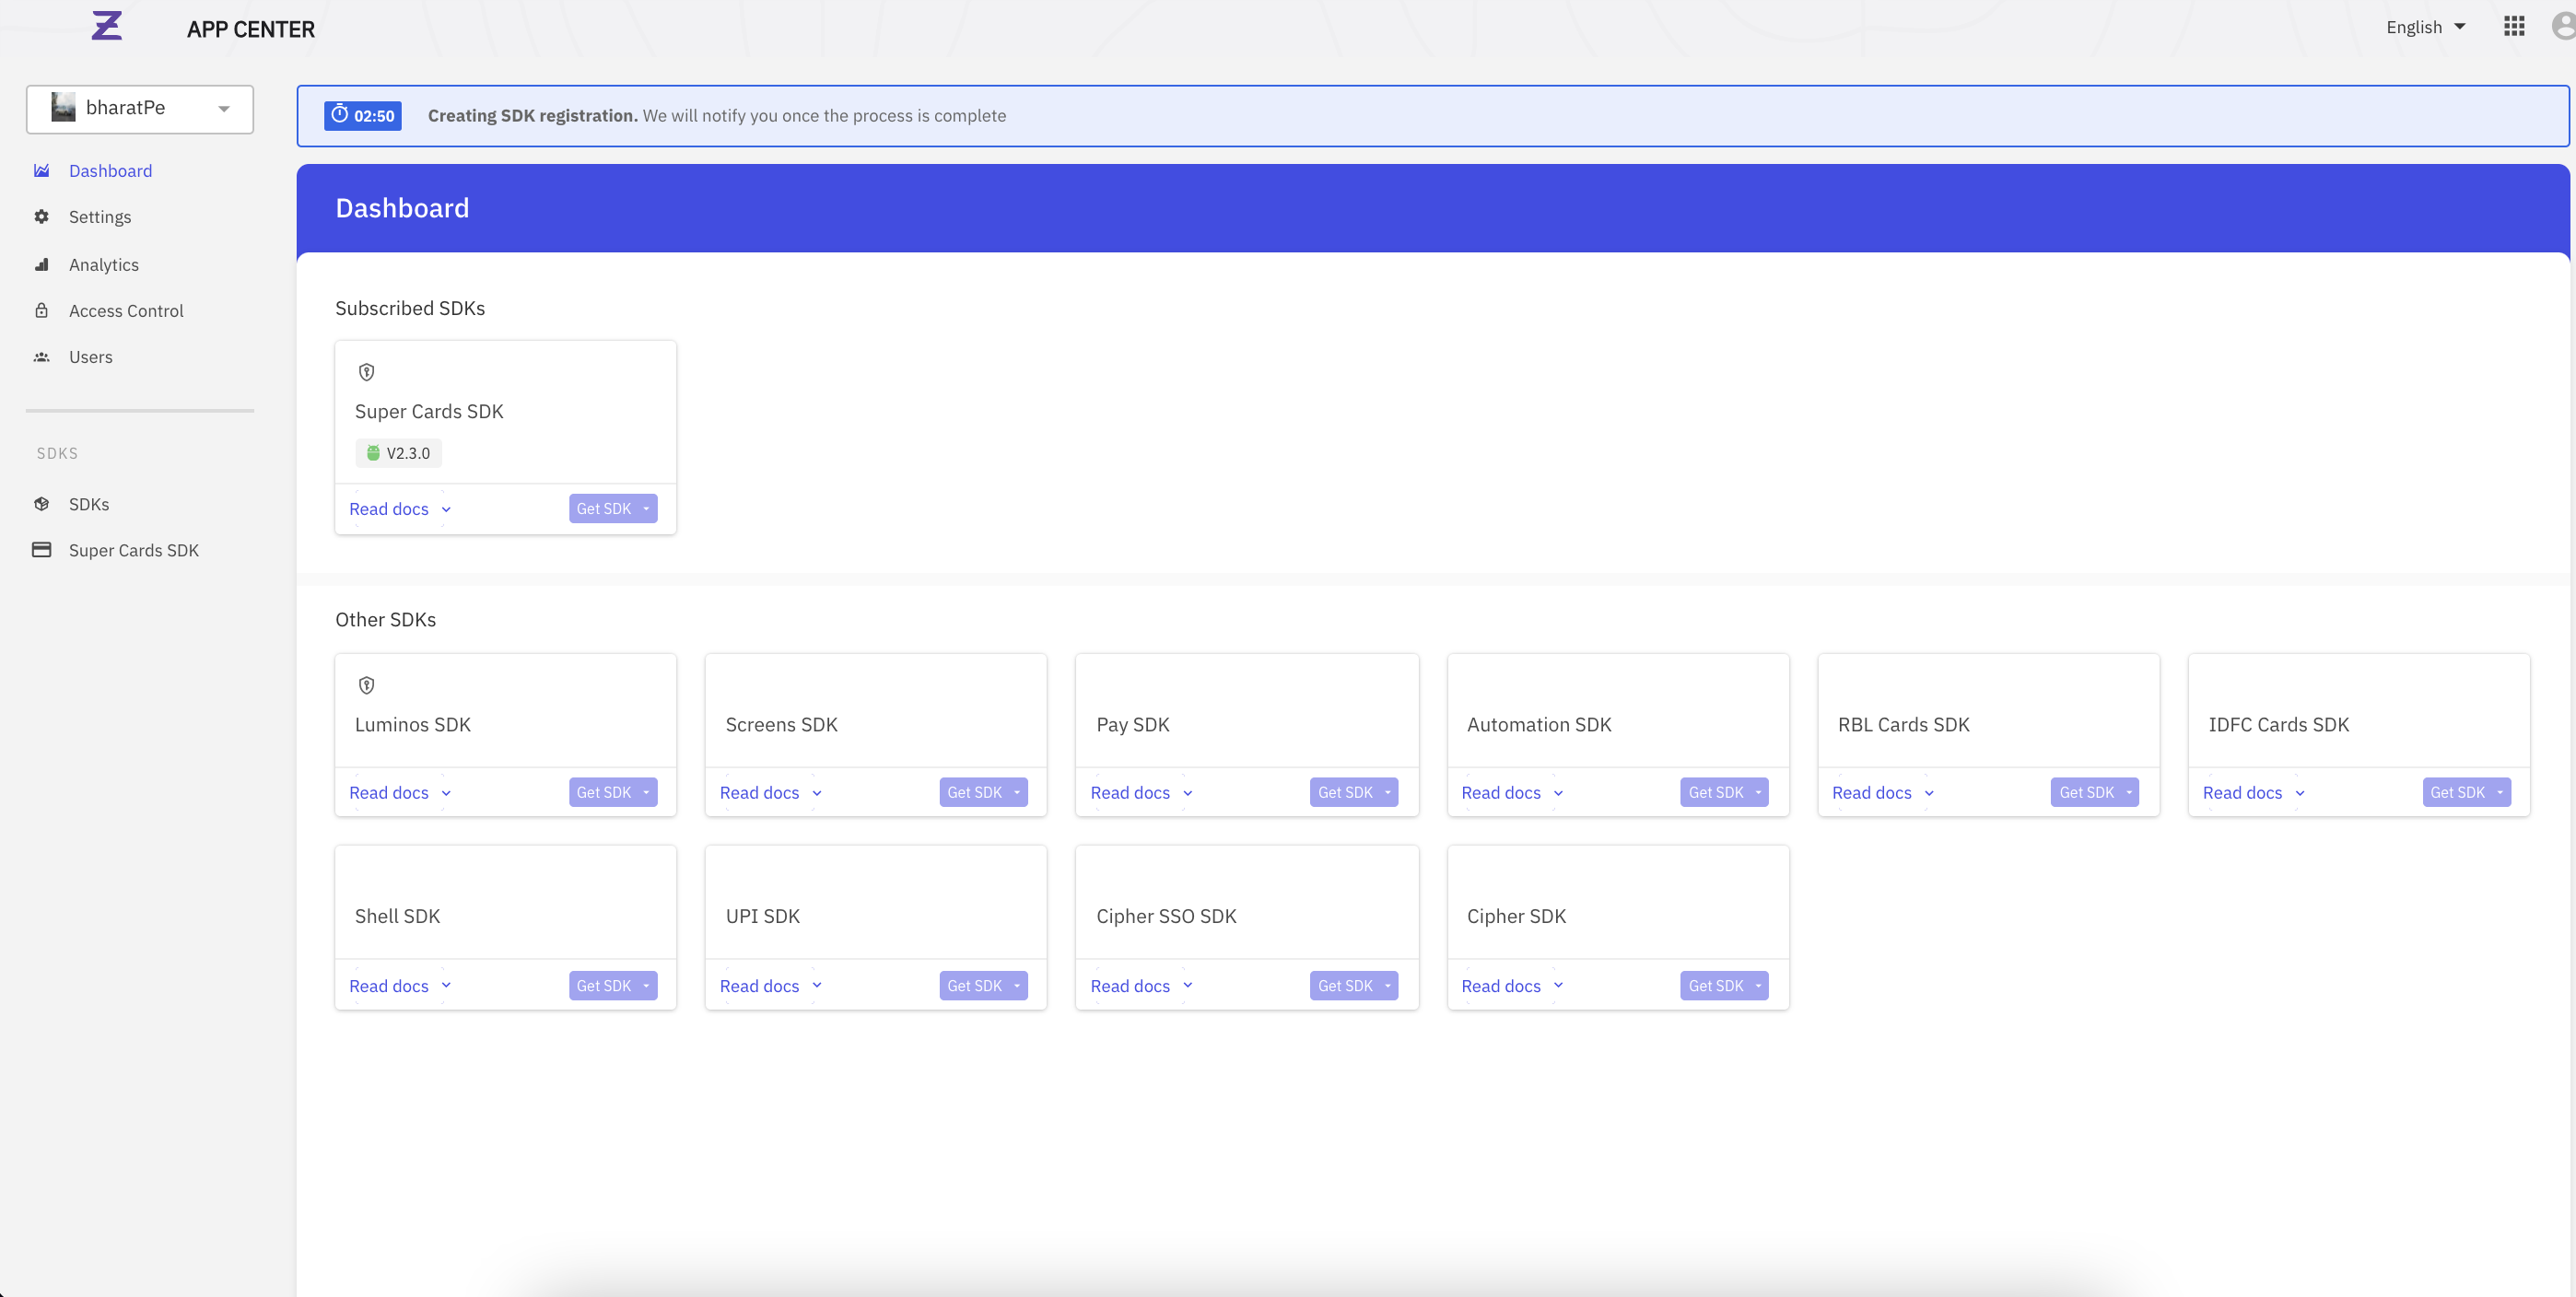
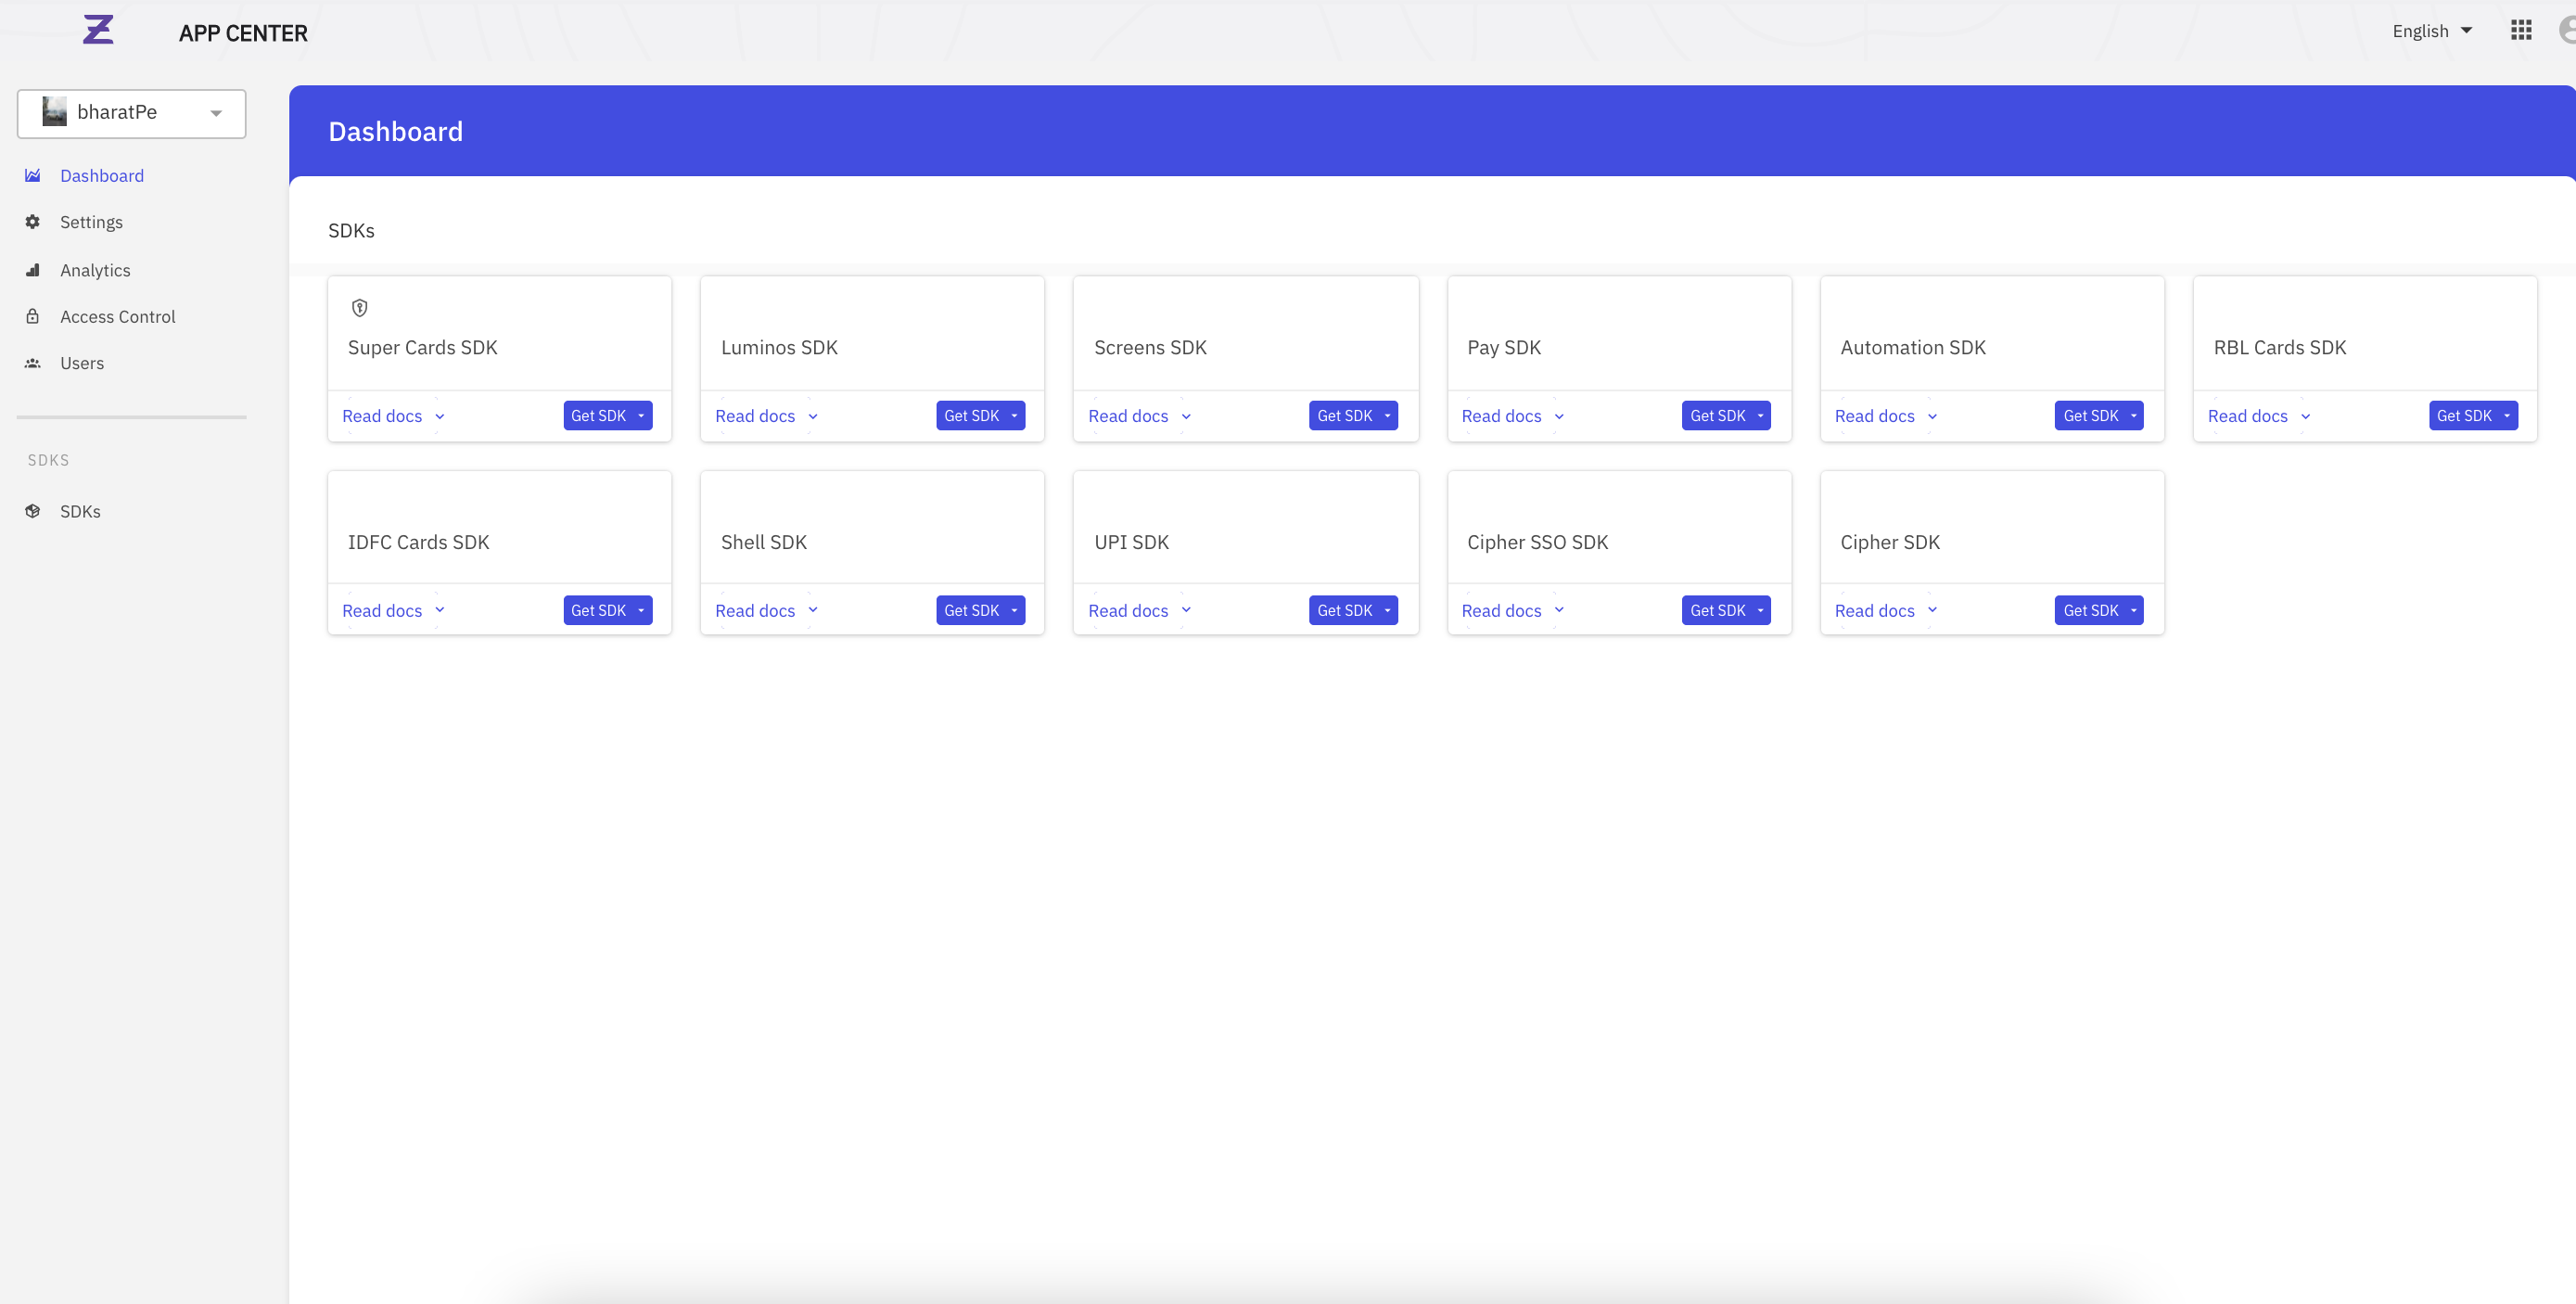
Step 2 : SDK subscription
- The user must subscribe to an SDK (eg : supercard SDK etc.) for a particular platform (Android/ iOS) that they wish to use, after they’ve successfully completed the project
- Subscribe to cards SDK by clicking the “Get SDK” option on supercardsdk & select the platform


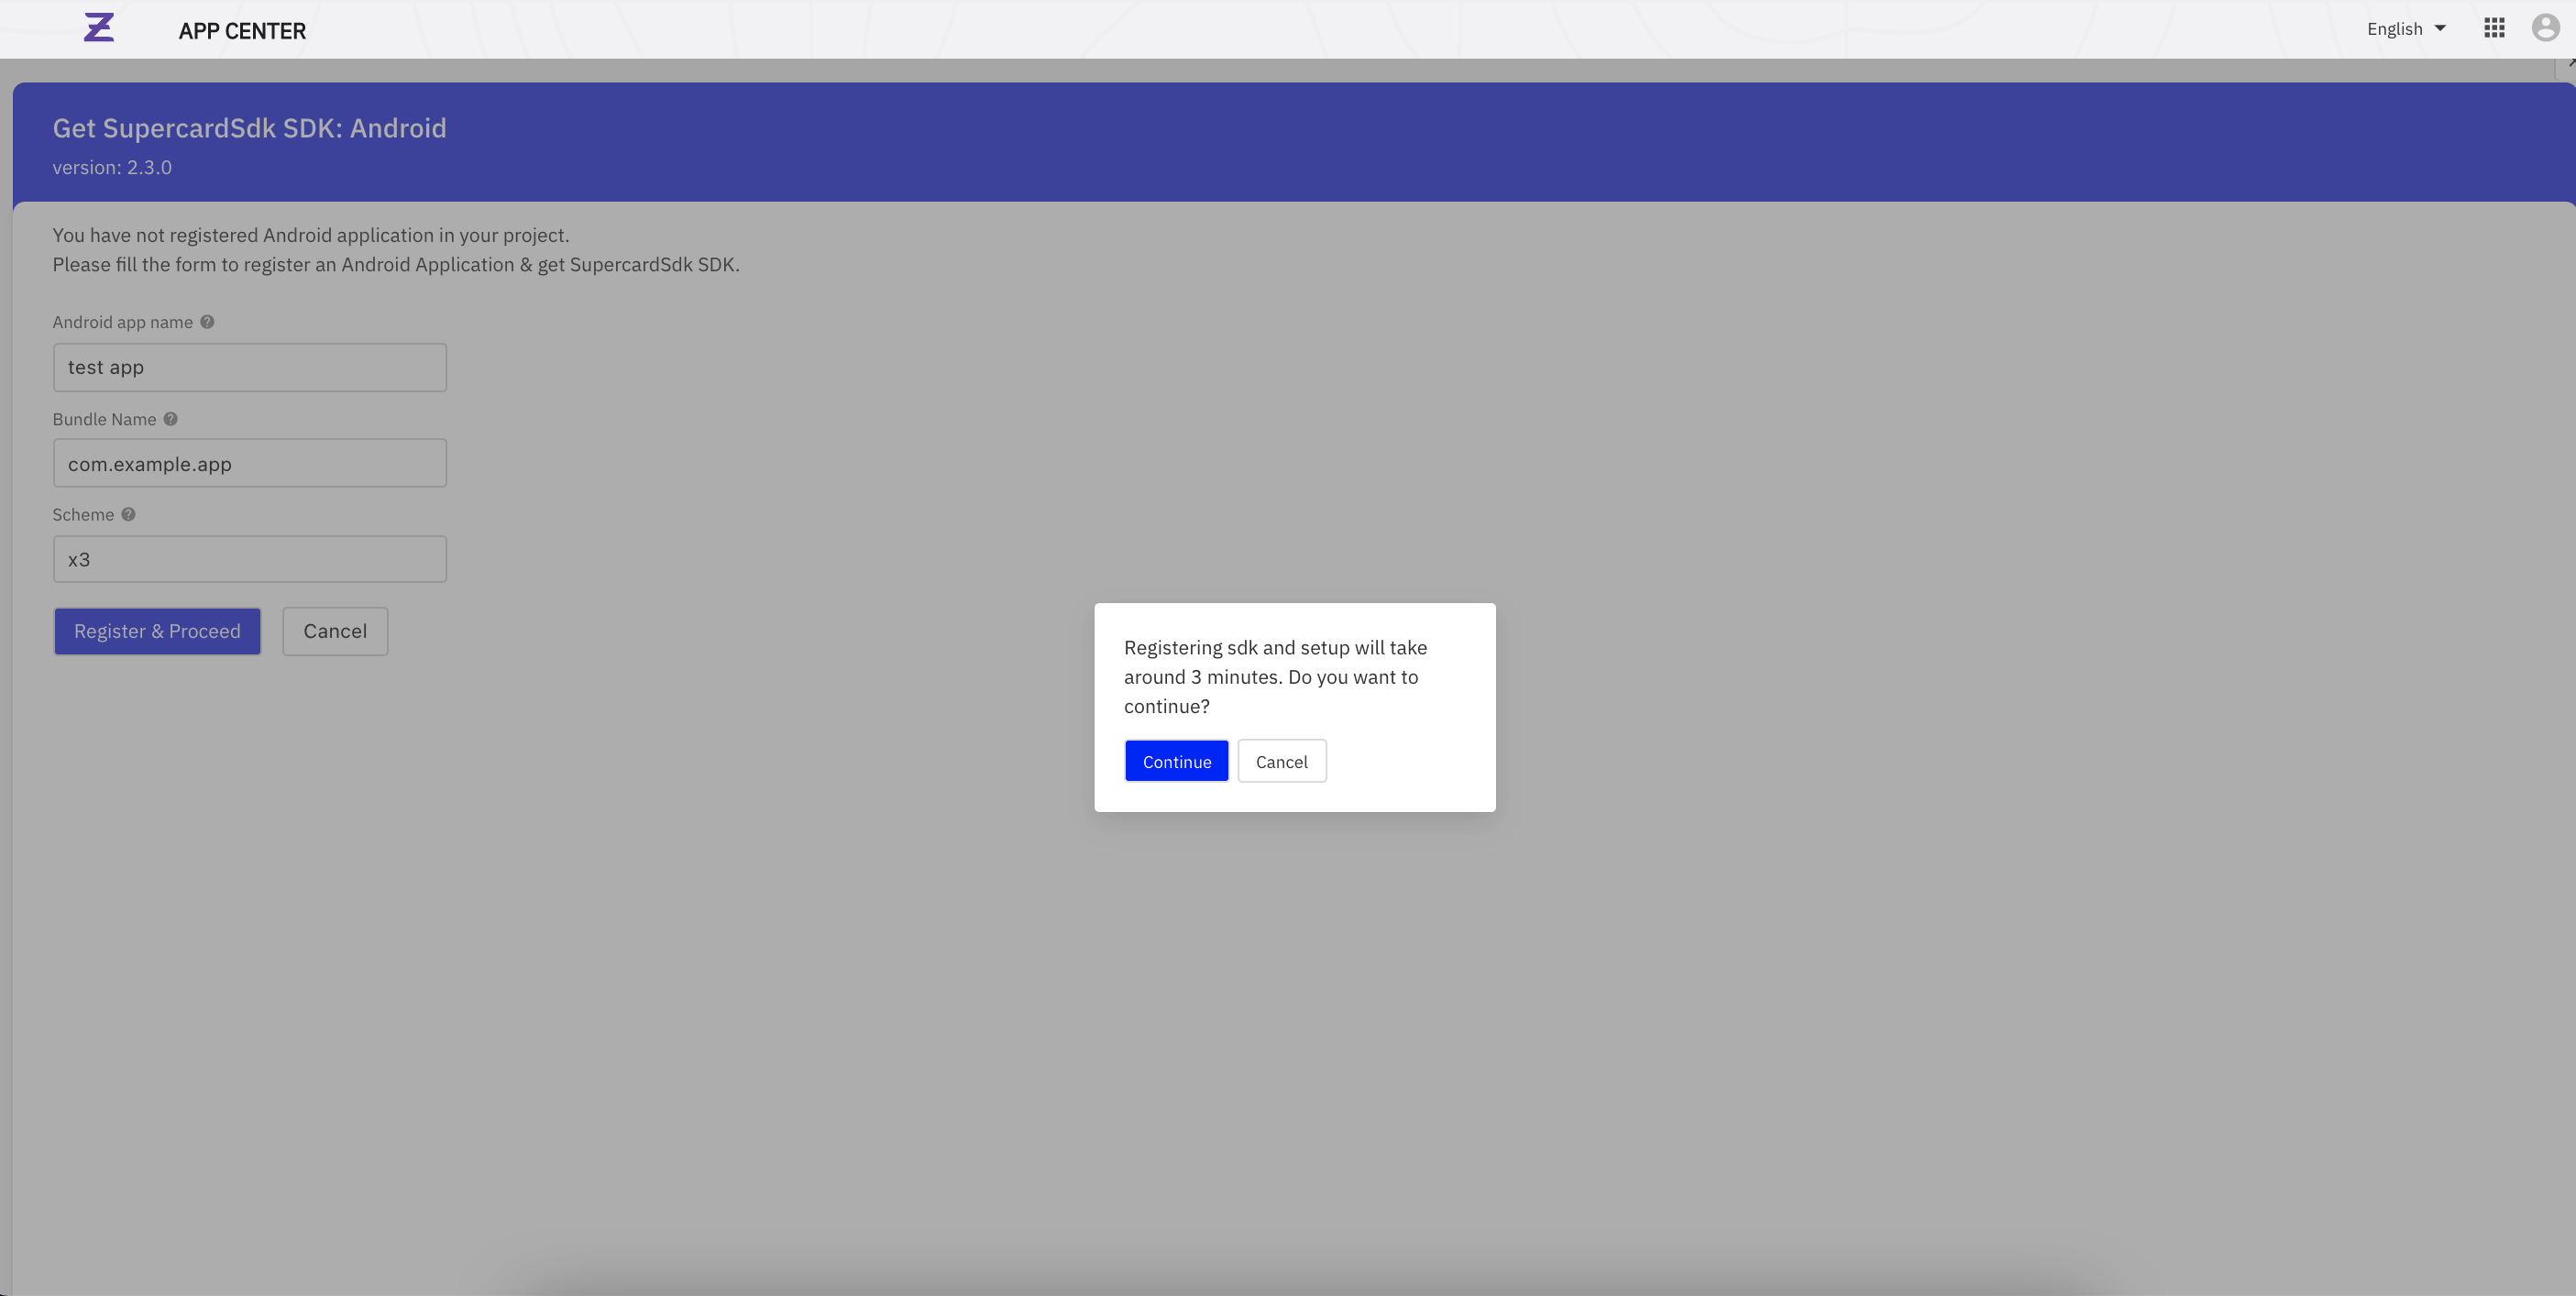
Step 3 : Application Registration
- Users need to have an application registered to subscribe to the SDK for consumption. Enter the following platform specific details for the application.
| Field | Description |
|---|---|
| Android/ iOS App name | The name of the application |
| Bundle name | Apps bundle name |
| Scheme name | The scheme used in their app |
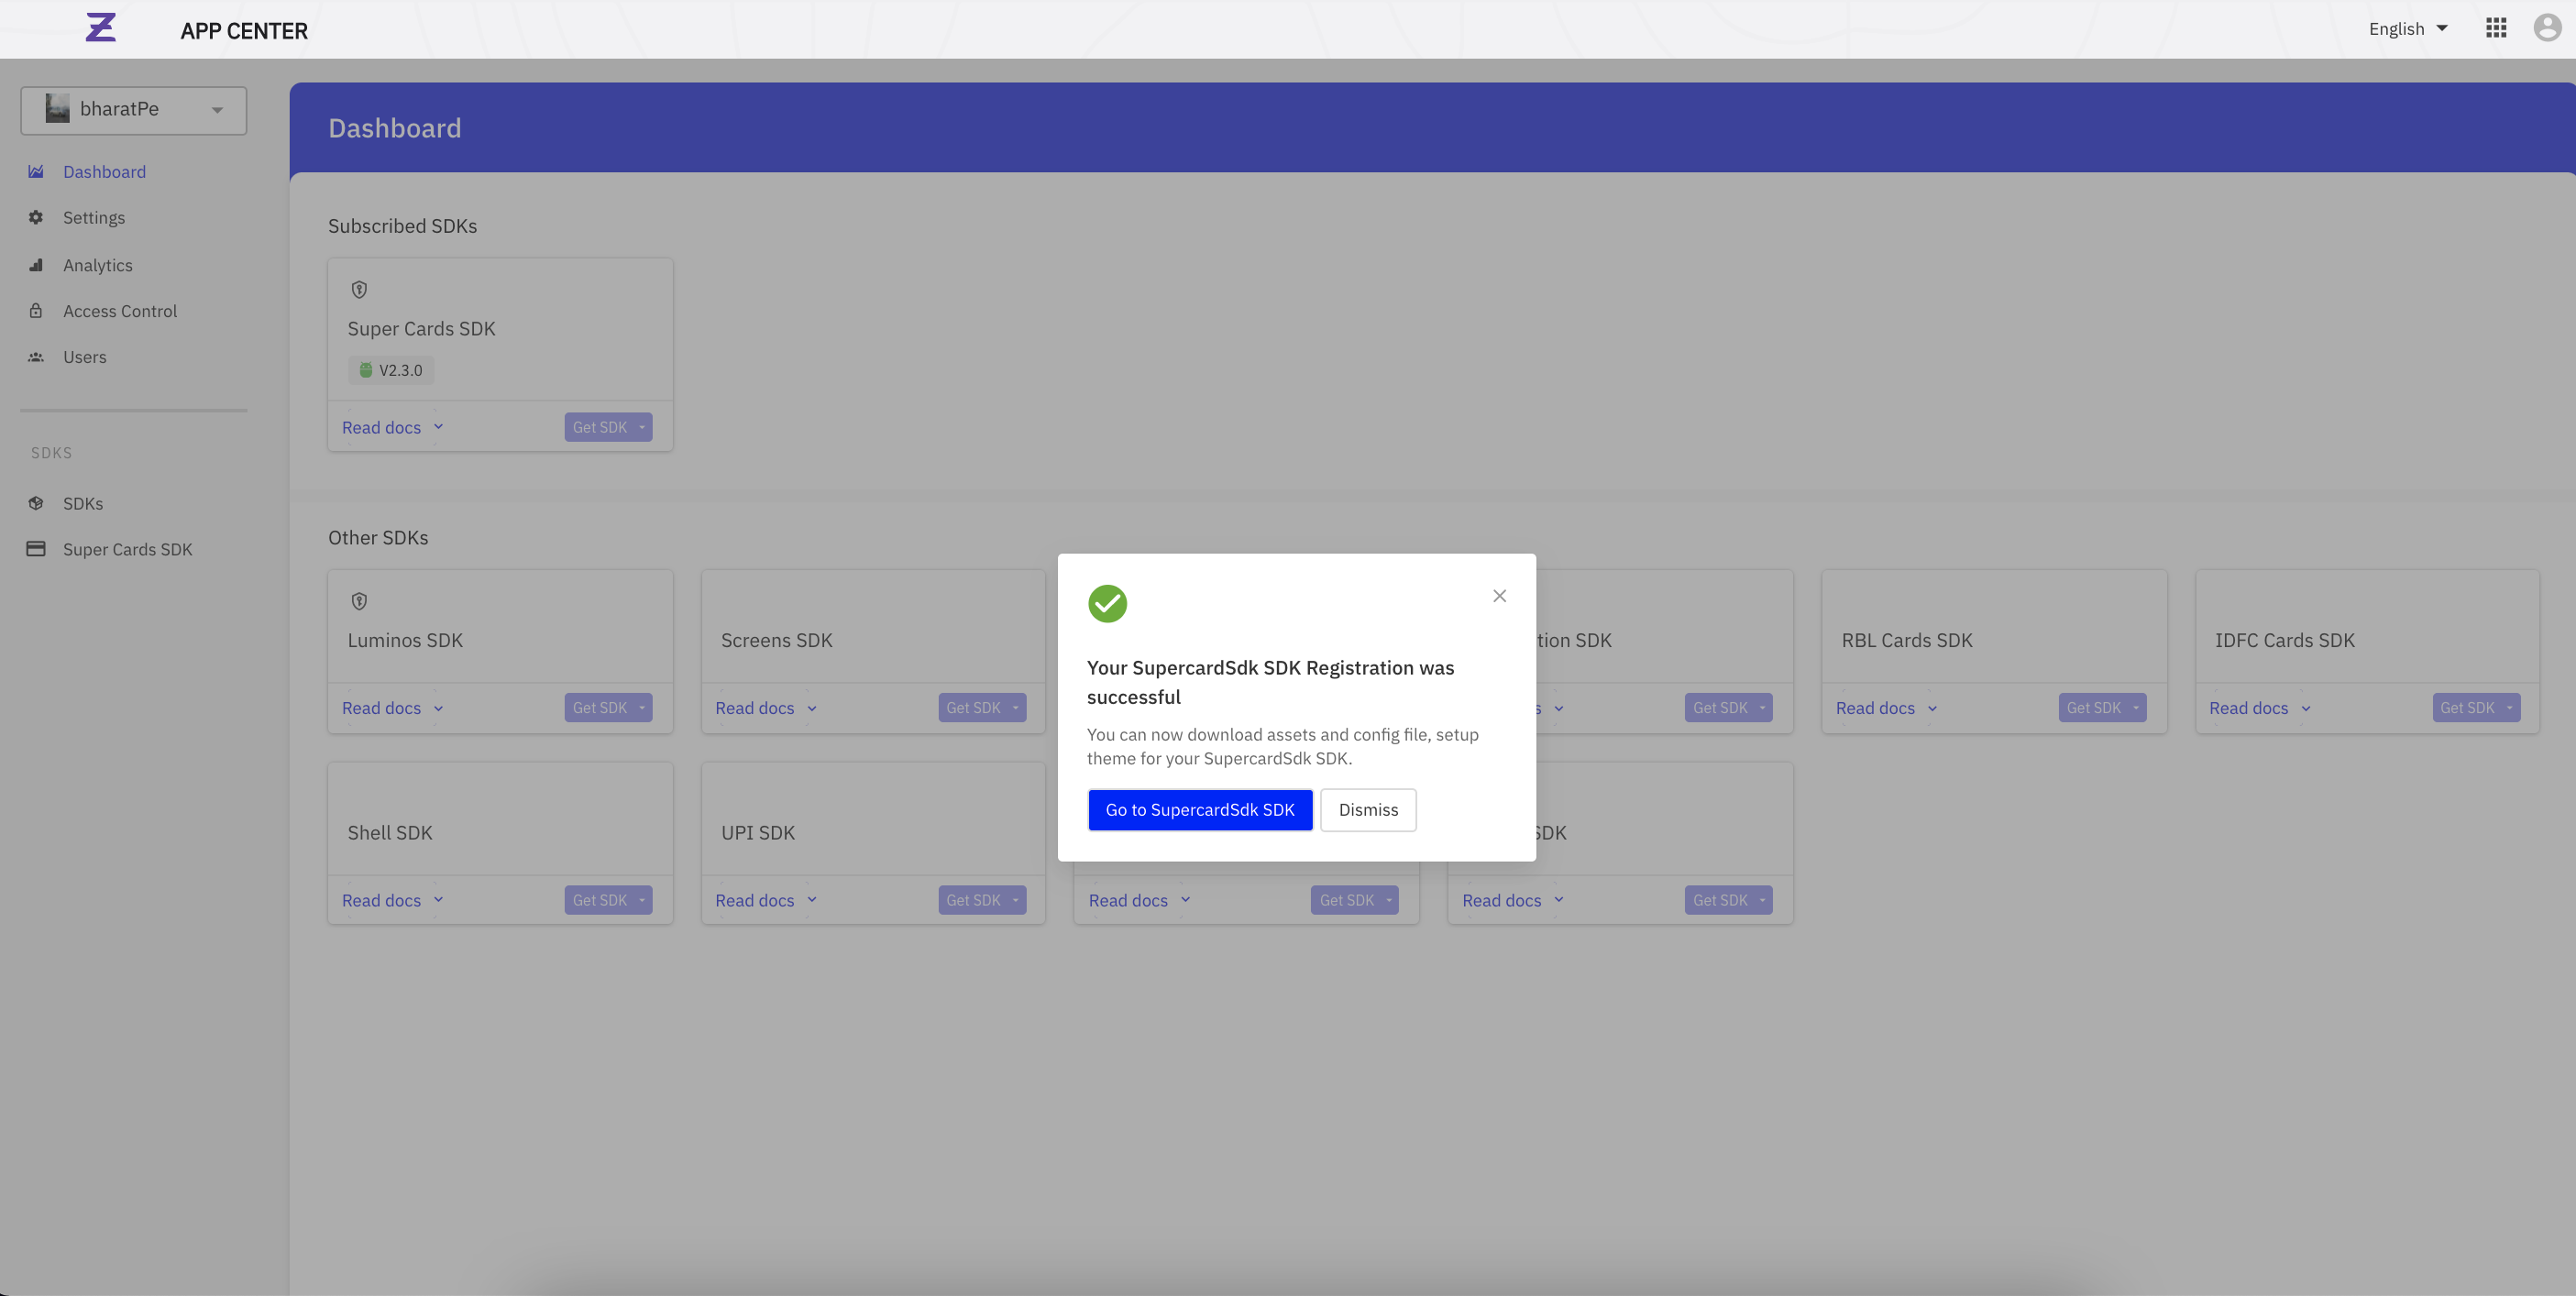
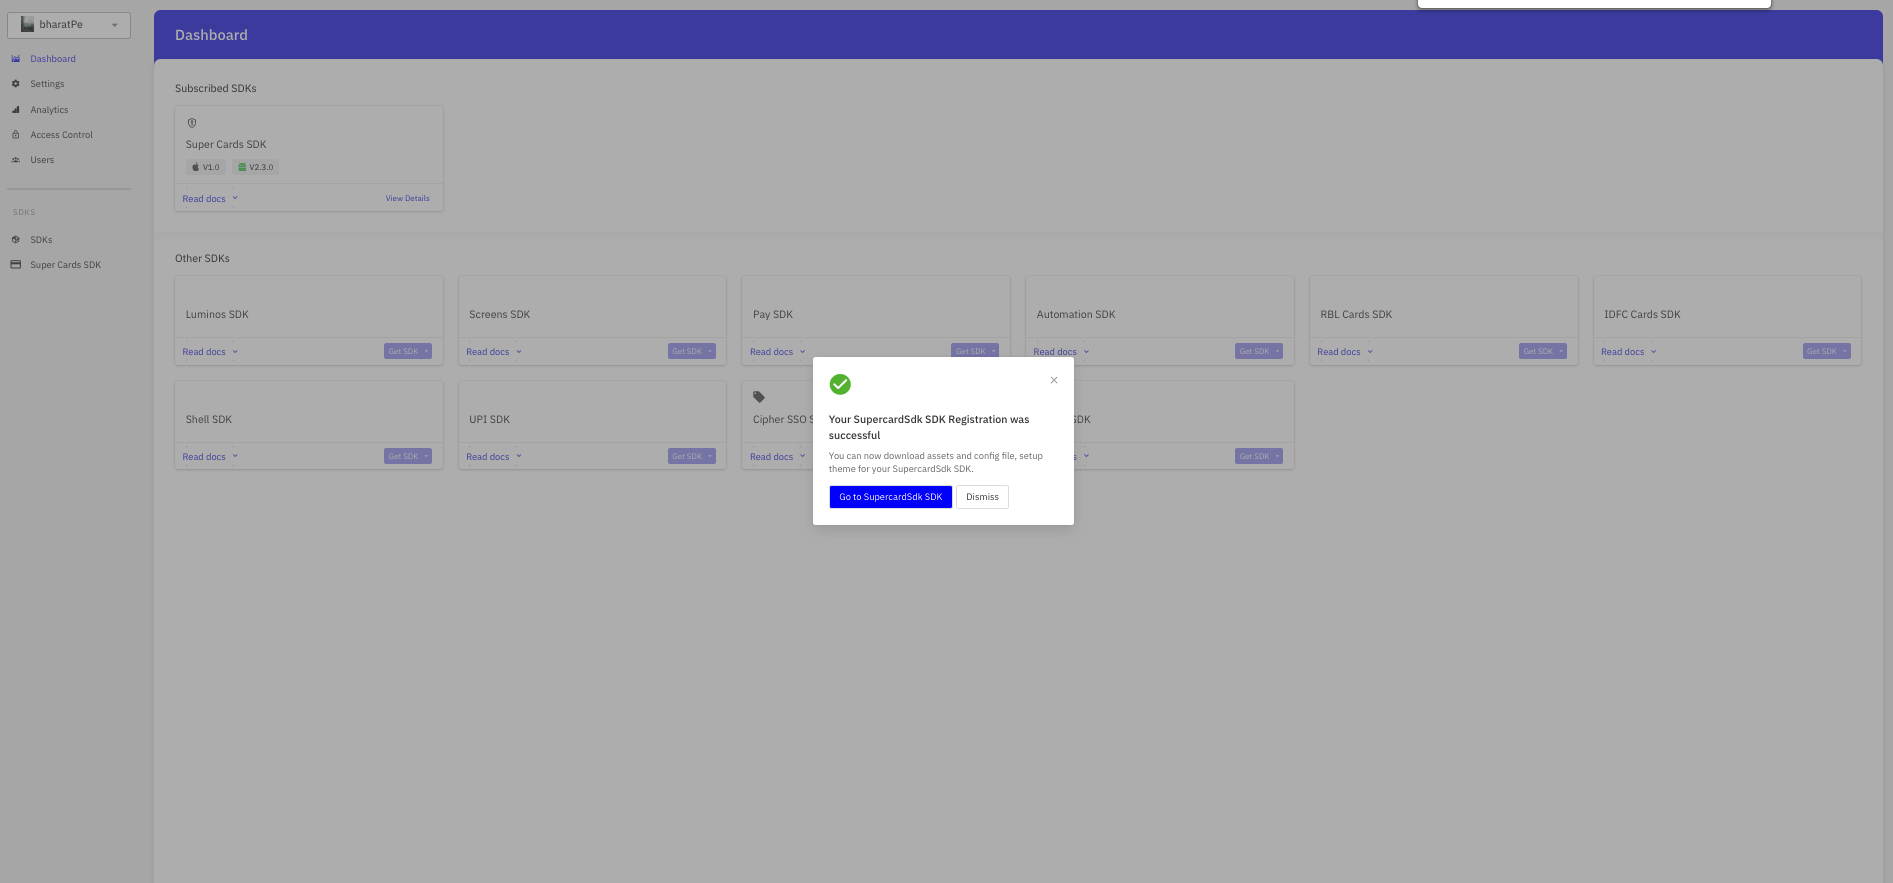
- Click “Register & Proceed” & then “Continue” CTA and wait for the 3 min timer to complete.
- Once the timer for Registration completes, click “Go supercard SDK“ on the prompt. This will take you to the SDK details page.
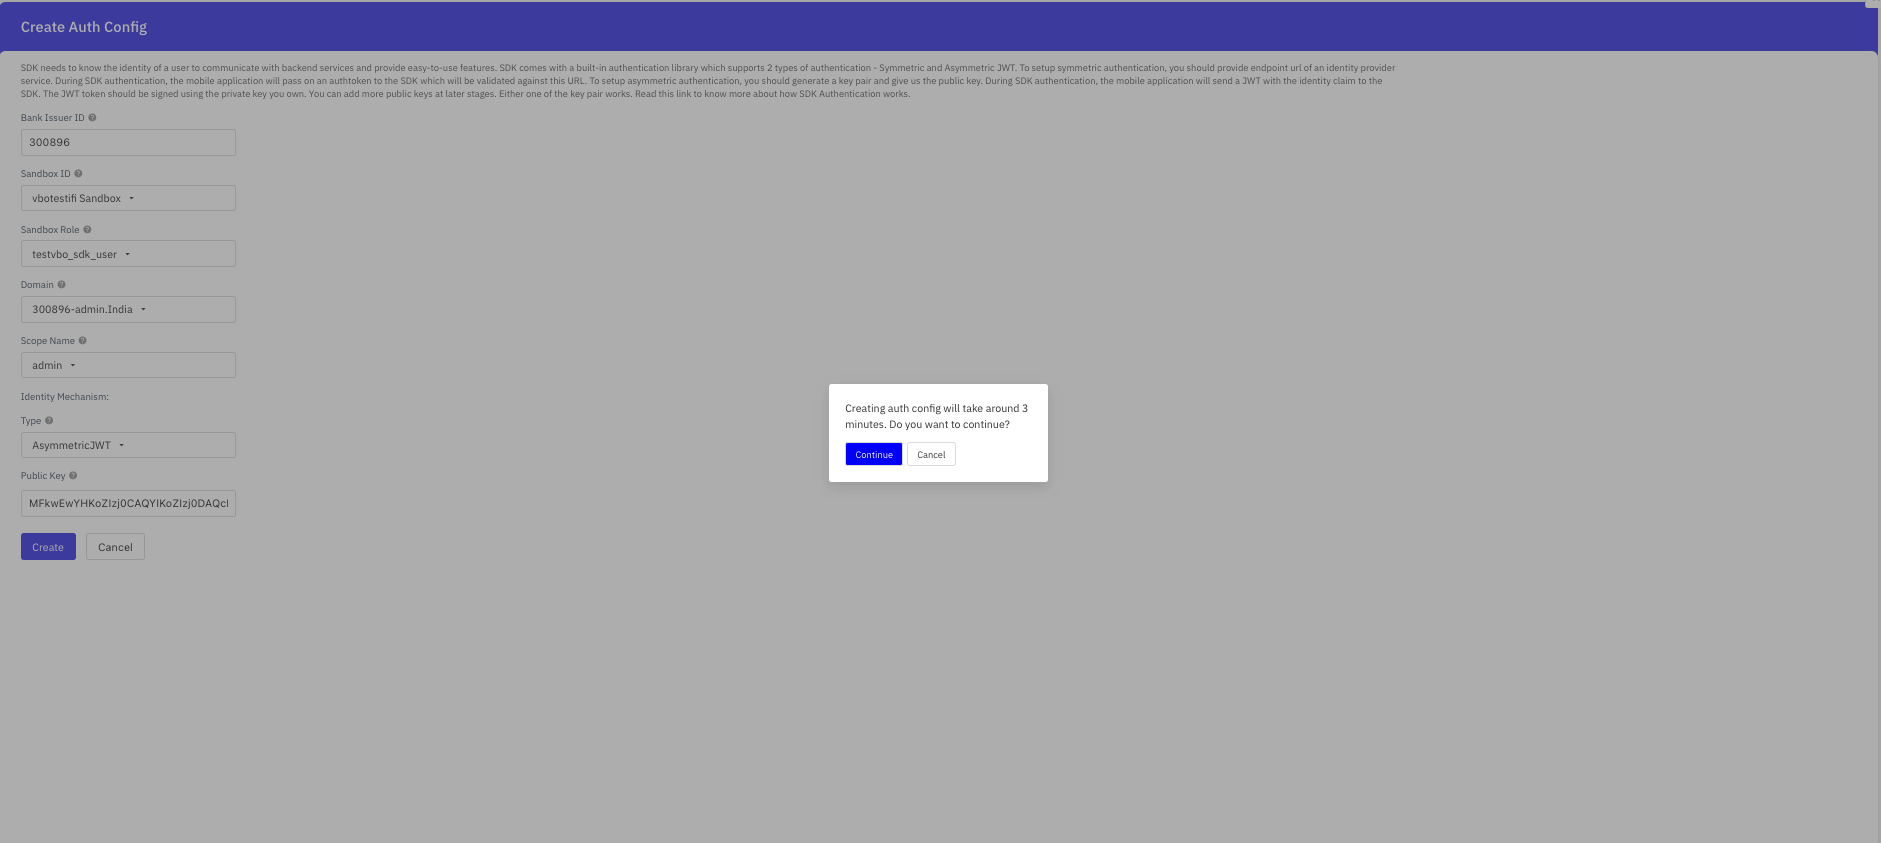
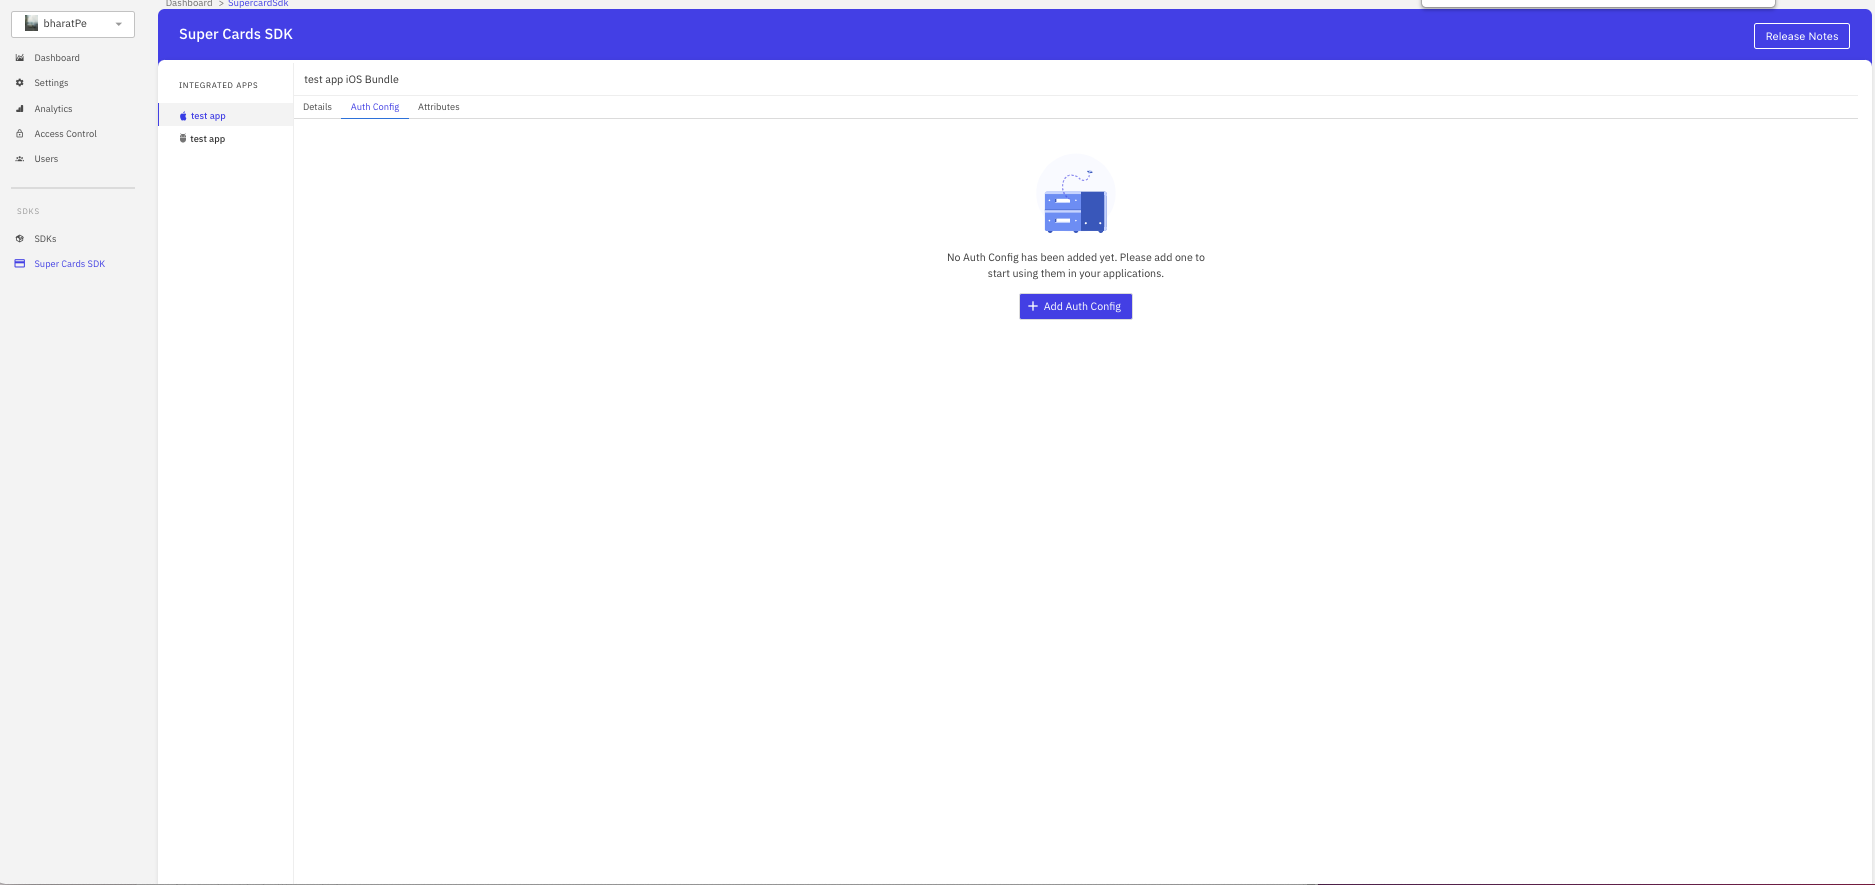
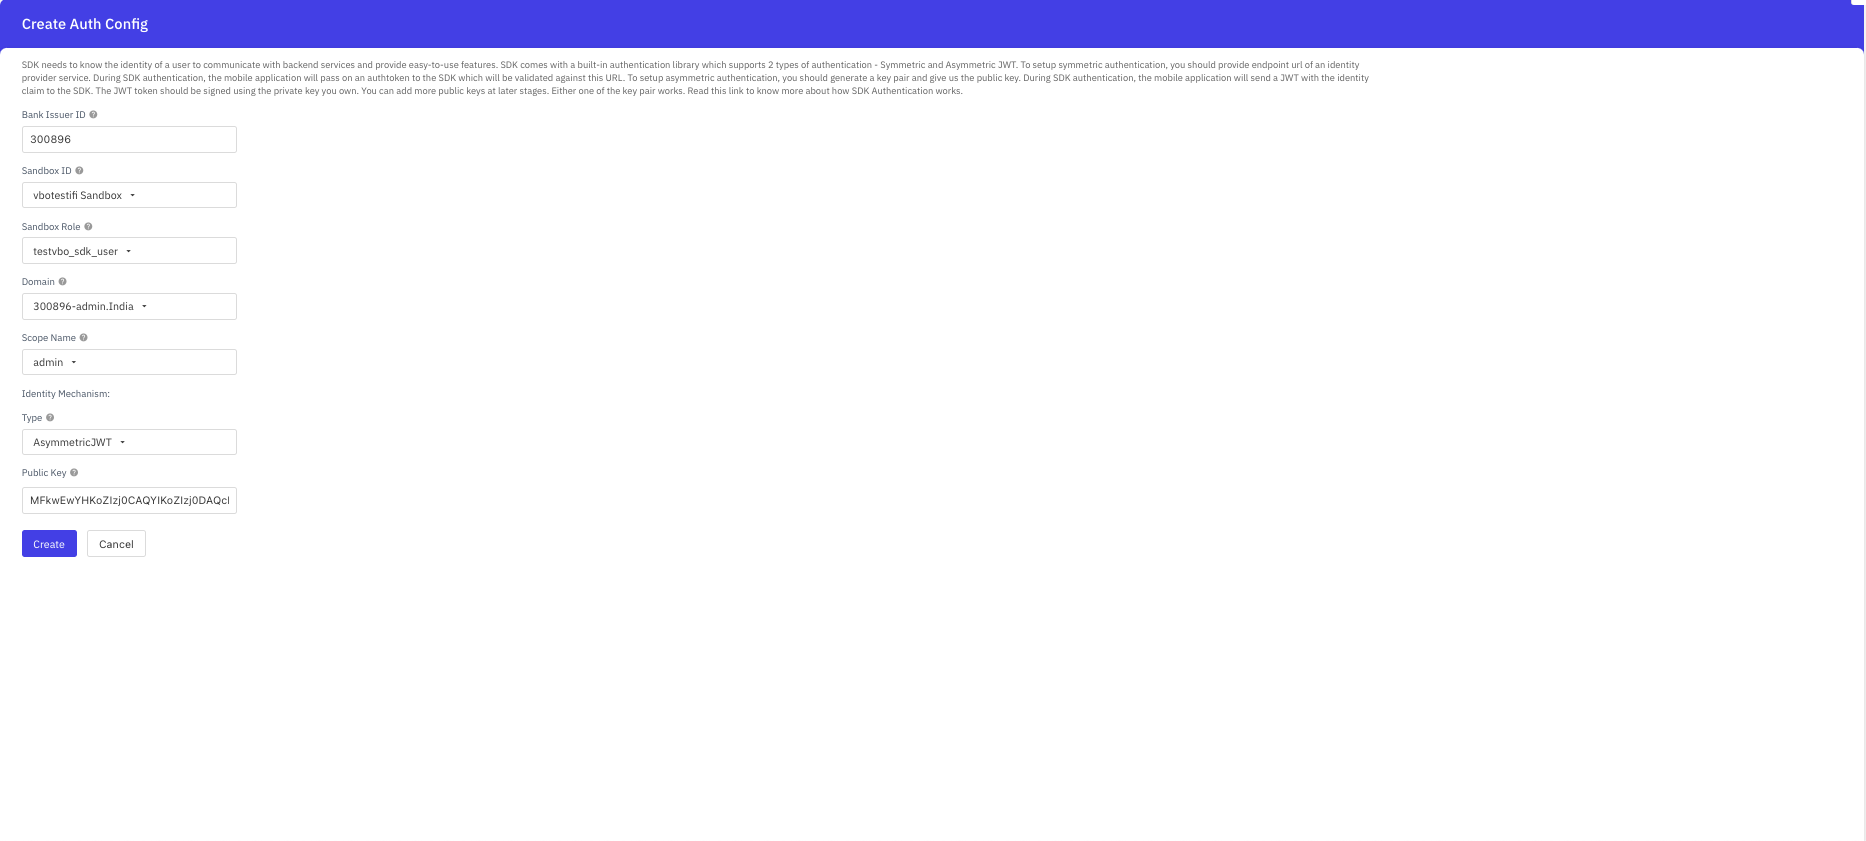
Step 4 : Auth Config setup
- An auth profile has to be set up for the VBO to be able to authenticate the SDK & begin using functionalities that the SDK has on offer.
- On the SDK details page, click on the “Auth Config” tab

- Click on “Add Auth Config”
- Enter the following details (these details would be provisioned for you via email)
- Bank issuer ID
- Sandbox ID
- Sandbox role
- Domain
- Scope name
- Auth type : select Asymmetric JWT auth

- After selecting asymmetric JWT auth use the following API in postman to generate a set of public & private keys
- curl –location –request GET ‘https://apollo-sdk-auth.stage.zeta.in/apollo-sdk-auth/1.0/keyPair'
- Copy the public key & enter it in the “Public Key” textbox in the App Center.
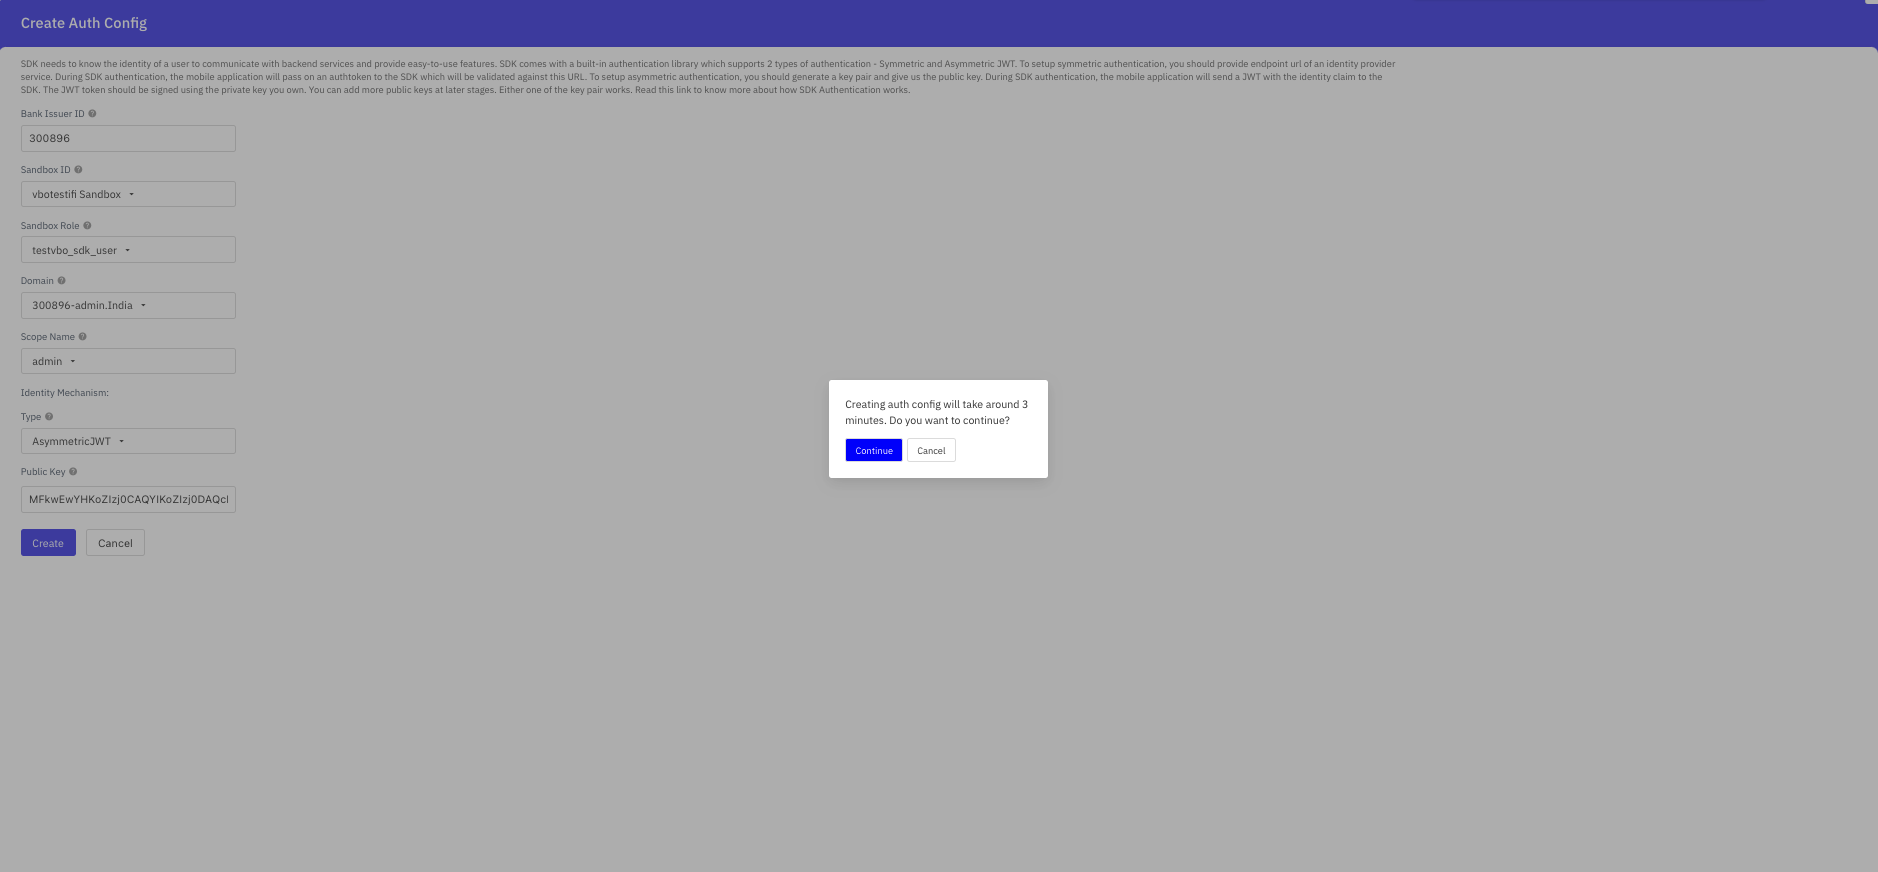
- Click “Create” & wait for the 3 minute timer to complete auth profile setup
- The corresponding private key can be used in your code to sign the tenantAuthToken (JWT).
Endpoint URI for tenantAuthToken (JWT) generation
Example

 Switch Theme
 Expand More
 Copy
Copy
curl --location --request POST 'https://apollo-sdk-auth.stage.zeta.in/apollo-sdk-auth/1.0/jwt/test' \
--header 'Cache-Control: no-cache' \
--header 'Content-Type: application/json' \
--header 'Postman-Token: b80e61a5-2b07-4b3f-87b5-396d3d78ecd1' \
--data-raw '{
"base64EncodedPrivateKey": "<privateKey>",
"claims": {
"tenantUniqueVectorId": "<account_holder_Id>"
},
"algorithm": "EC",
"issuerId": "xyztech",
"epochExpiryTimeInMilliseconds": 1661057459000
}
Code Copied
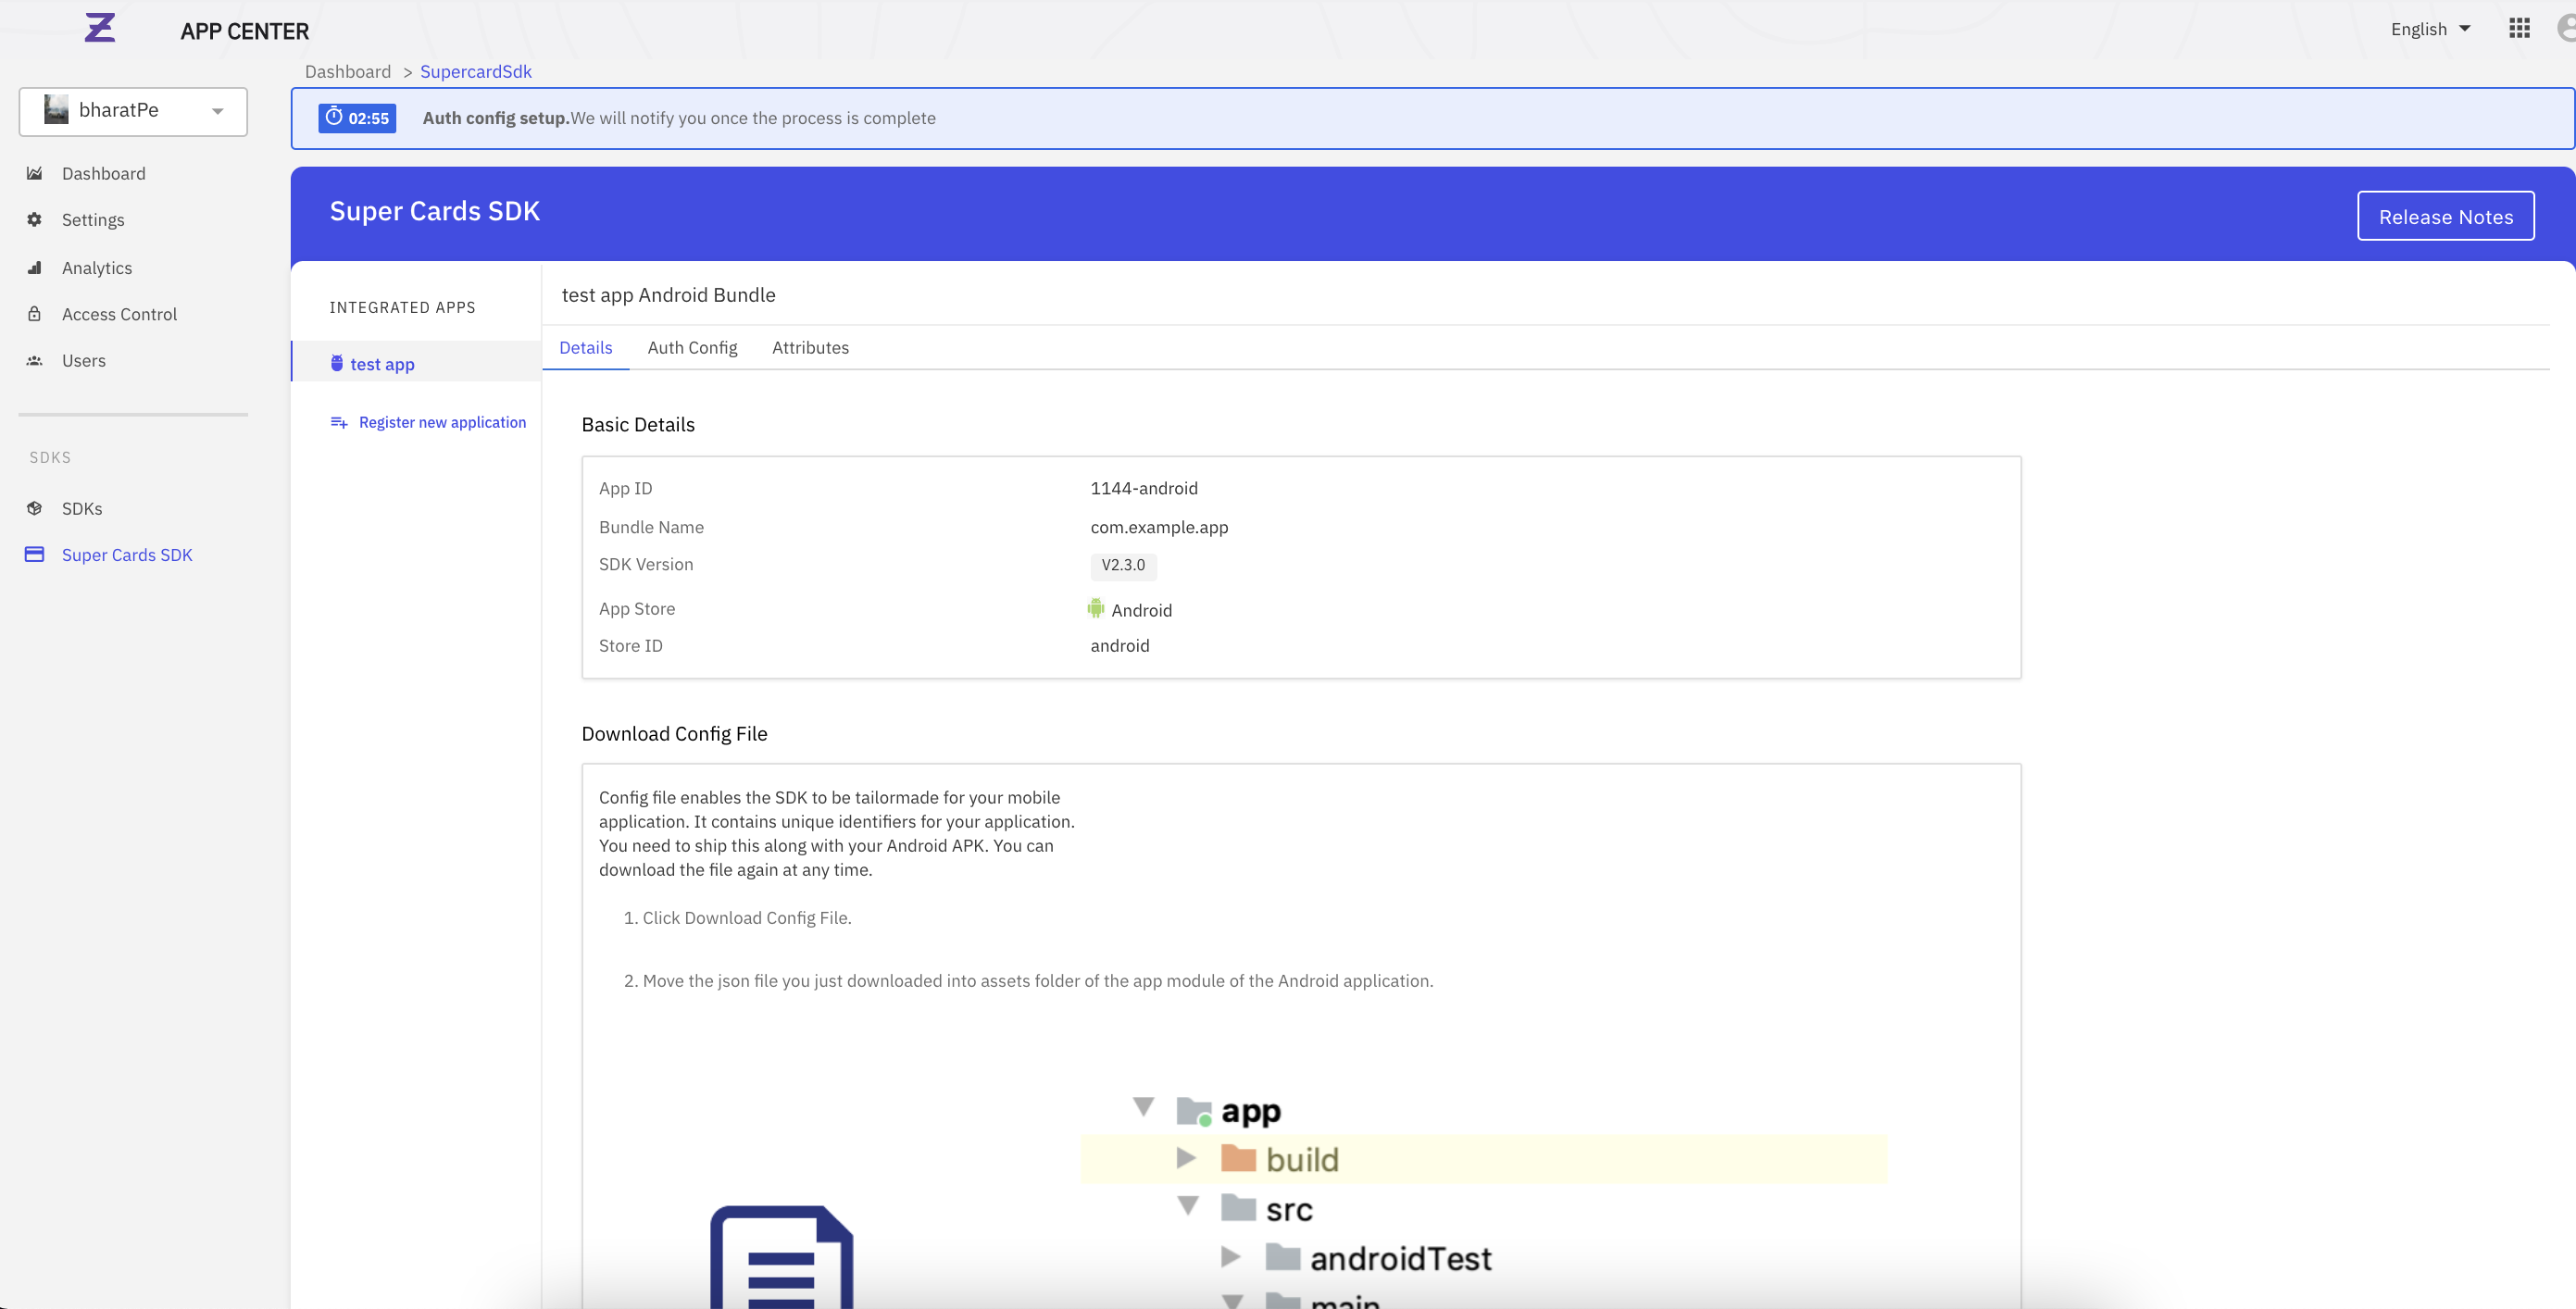
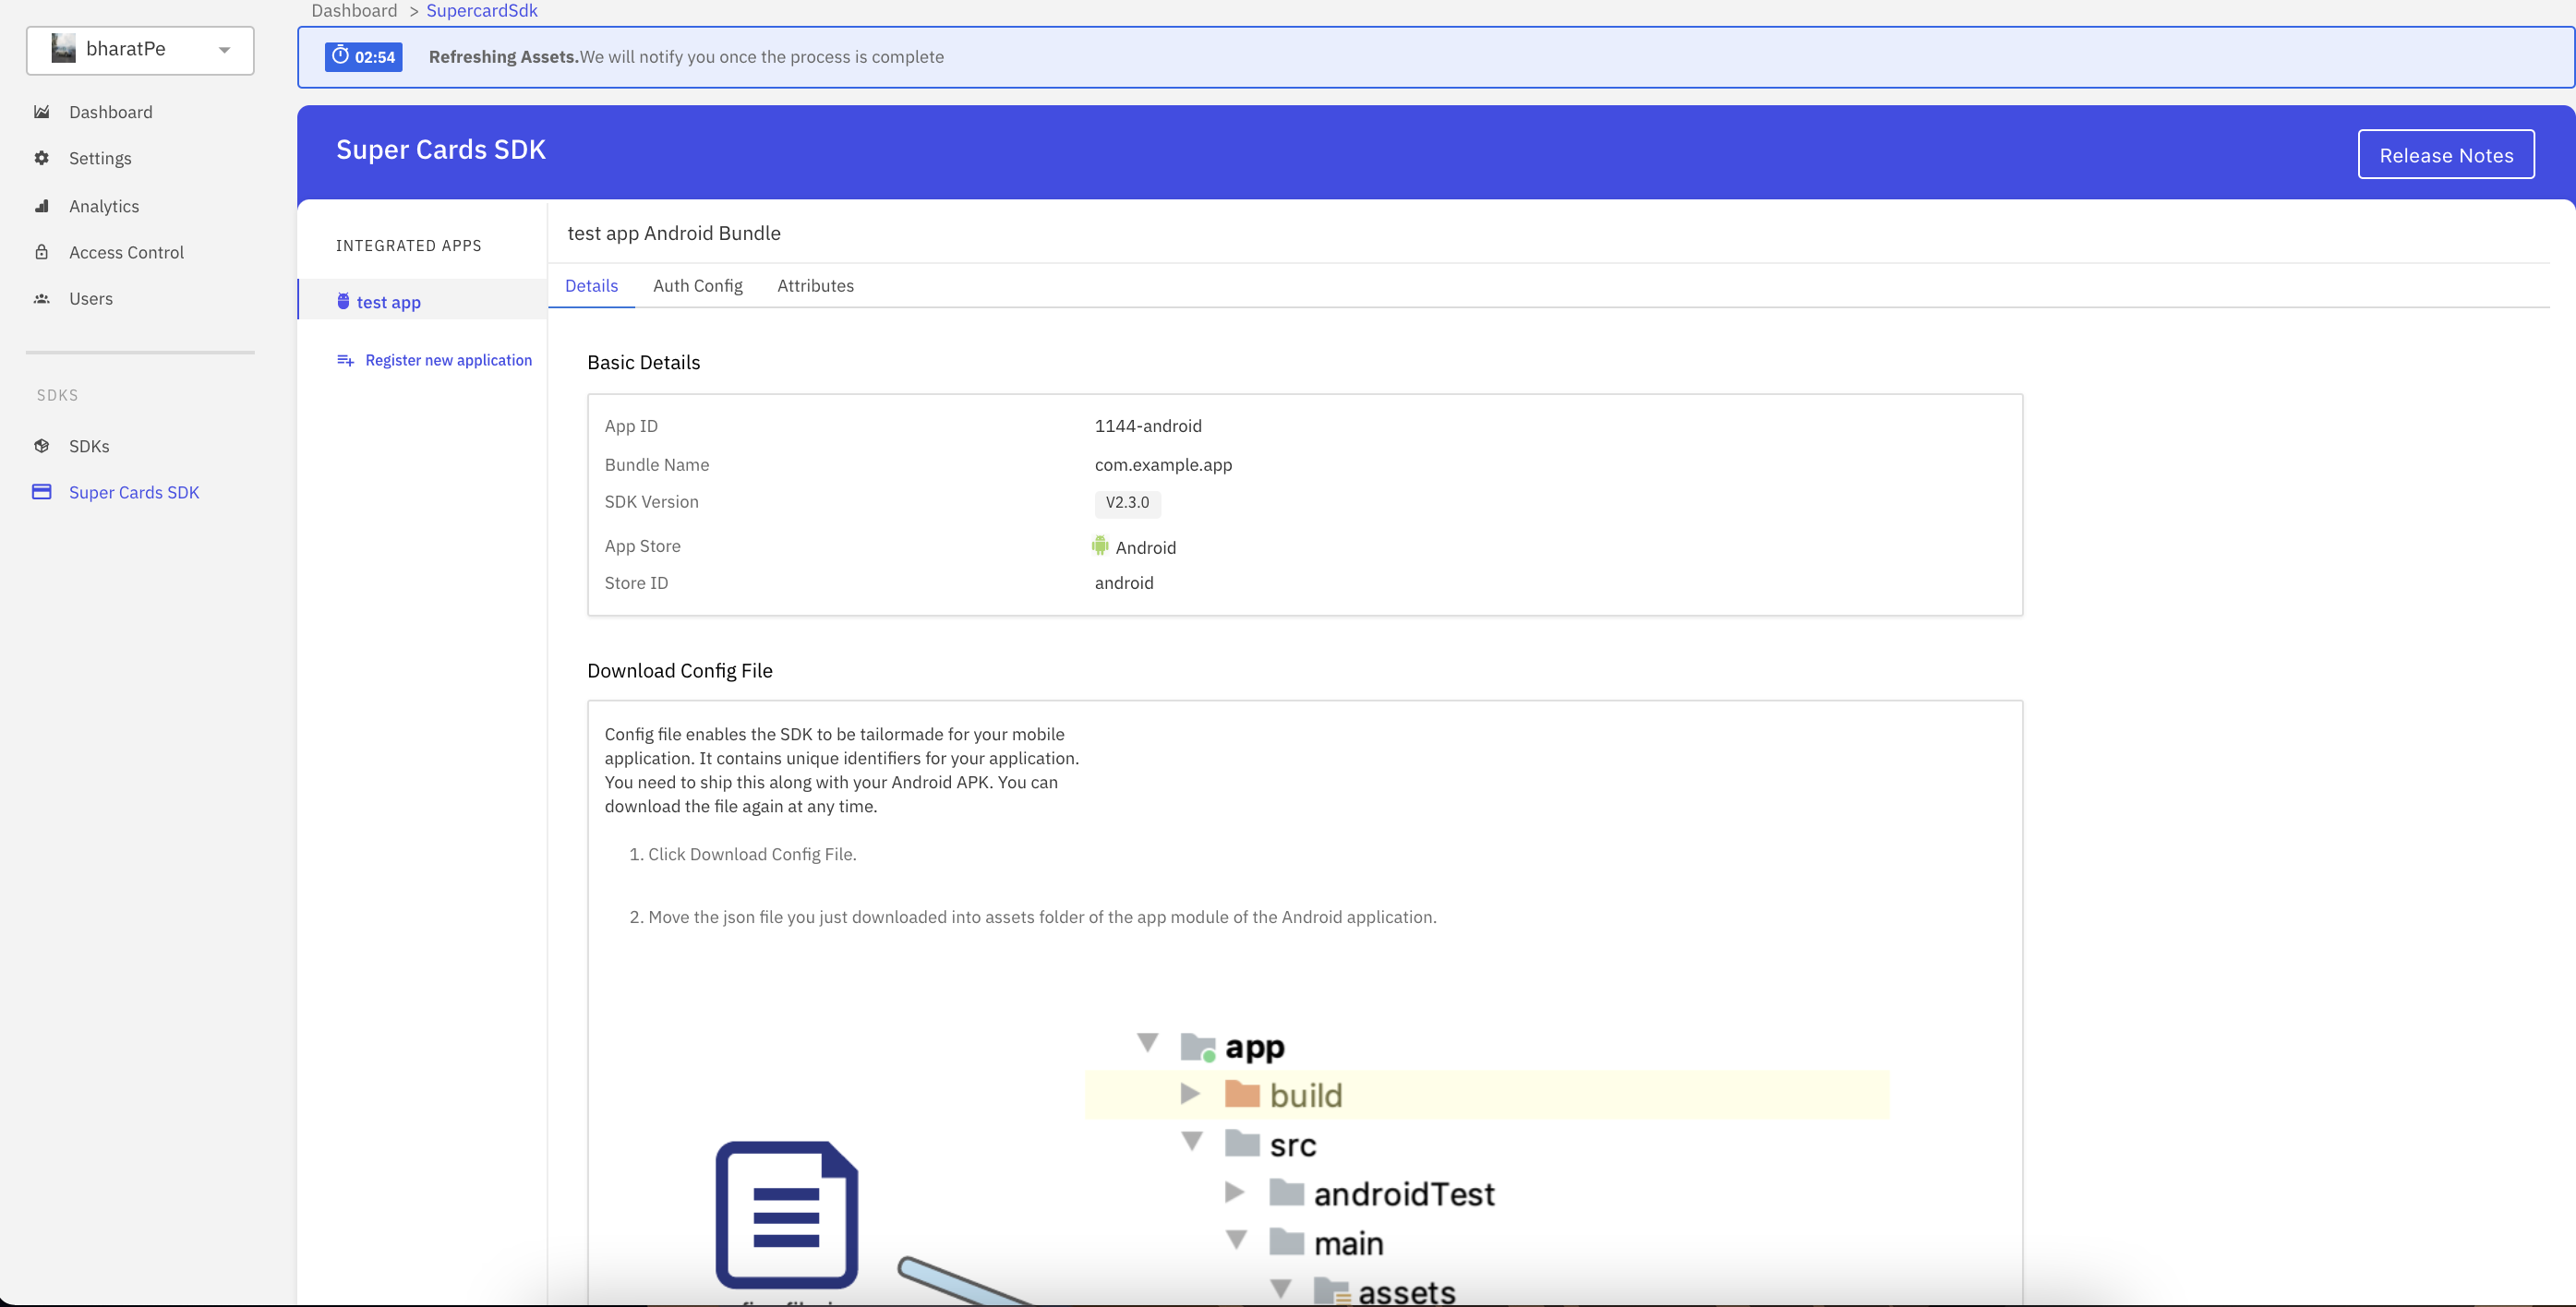
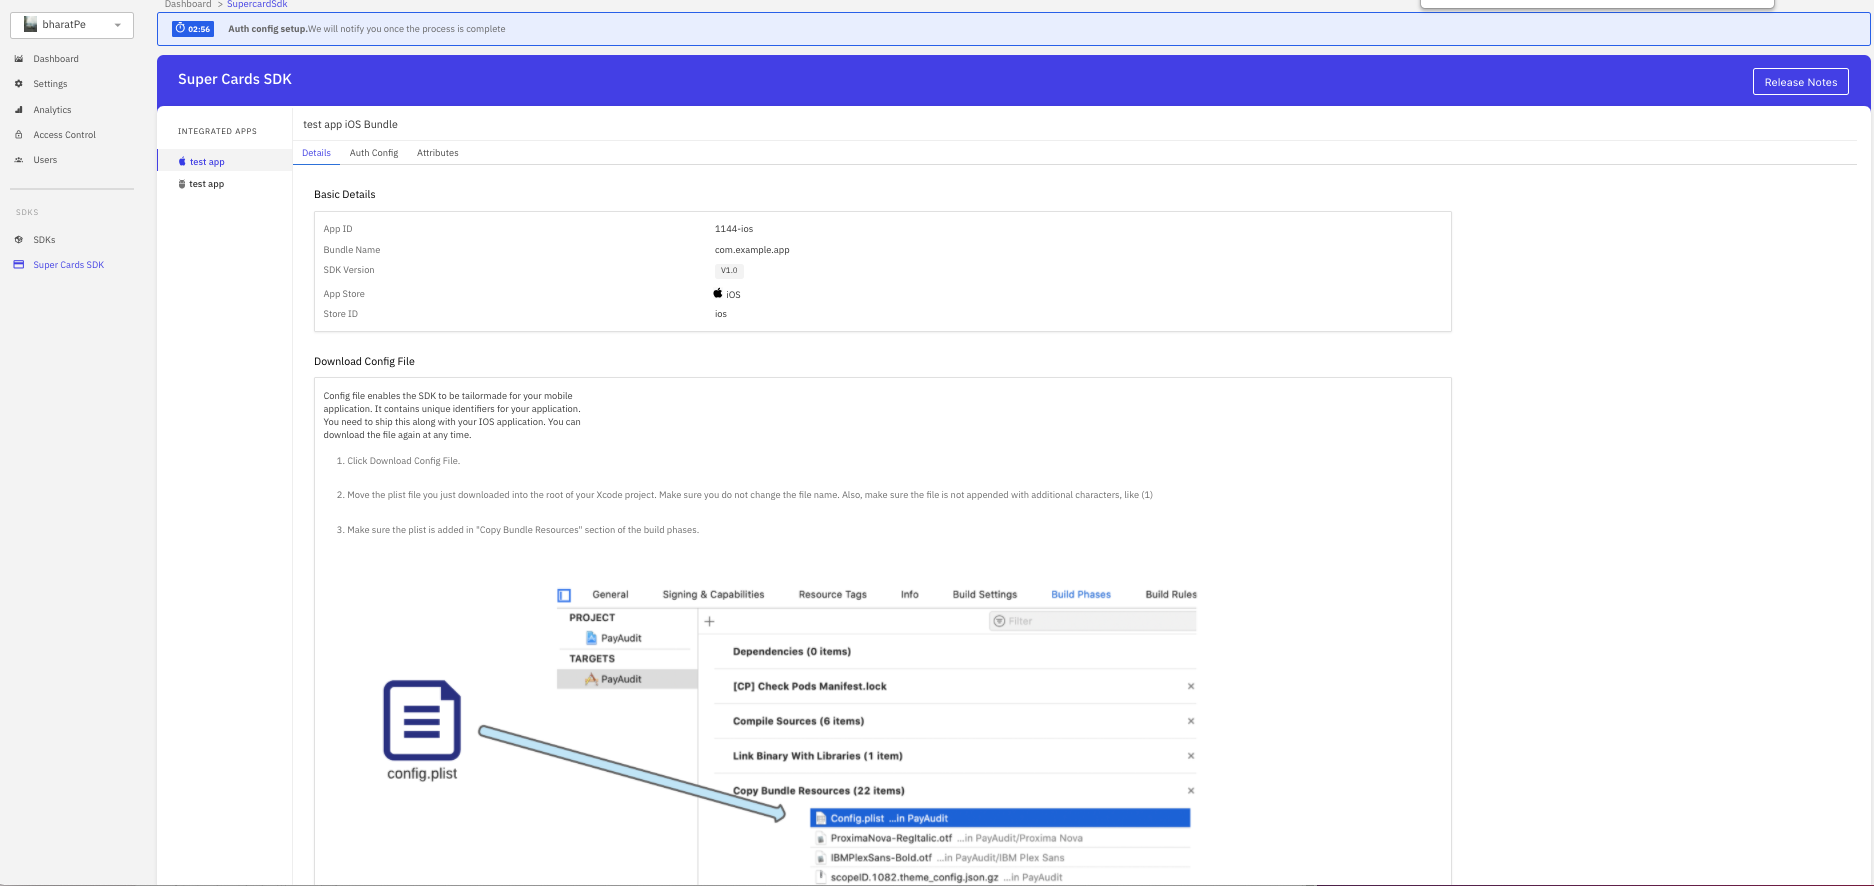
 Step 5 : SDK details page
-
This page summarises your SDK setup so far. It is where you will be able to download config, asset files, get code snippets with credentials, dependencies etc. as done in the existing integration document.
-
Once the timer for auth config setup complets, Navigate to the “Details” tab in the SDK page. Here you will be able to :
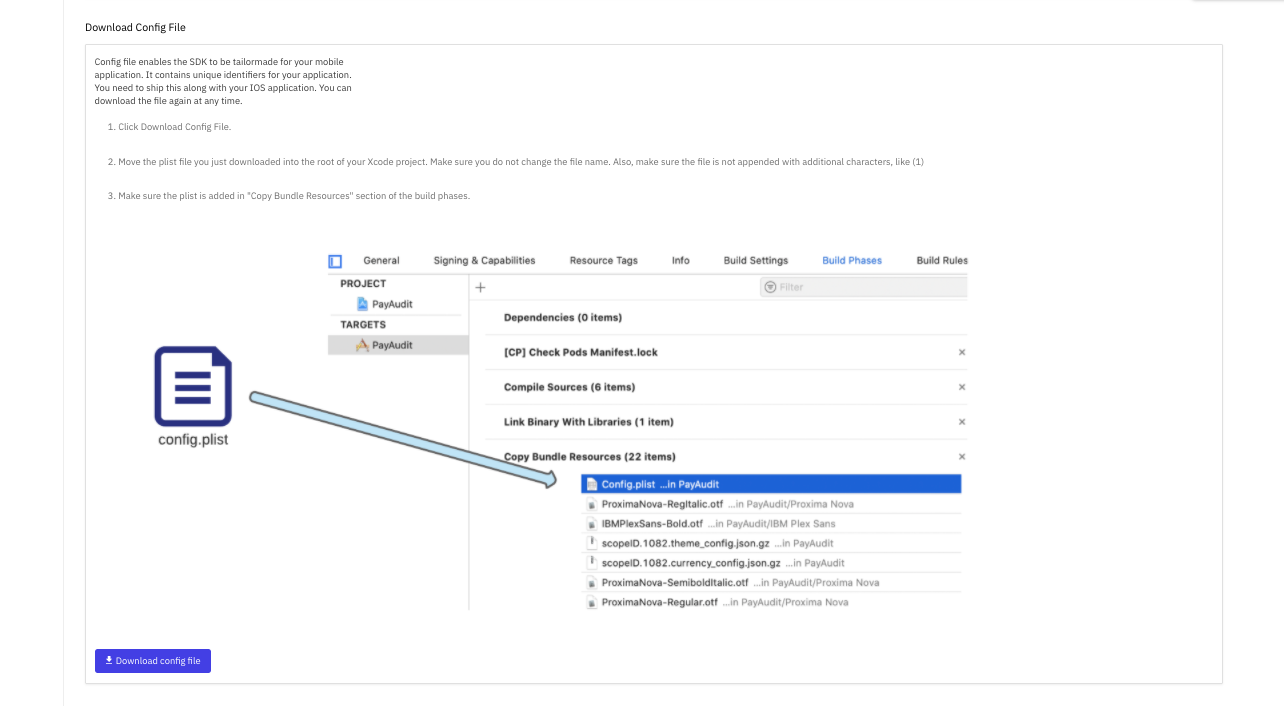
- Download config file
- Click “Download Config File” CTA to download the config file
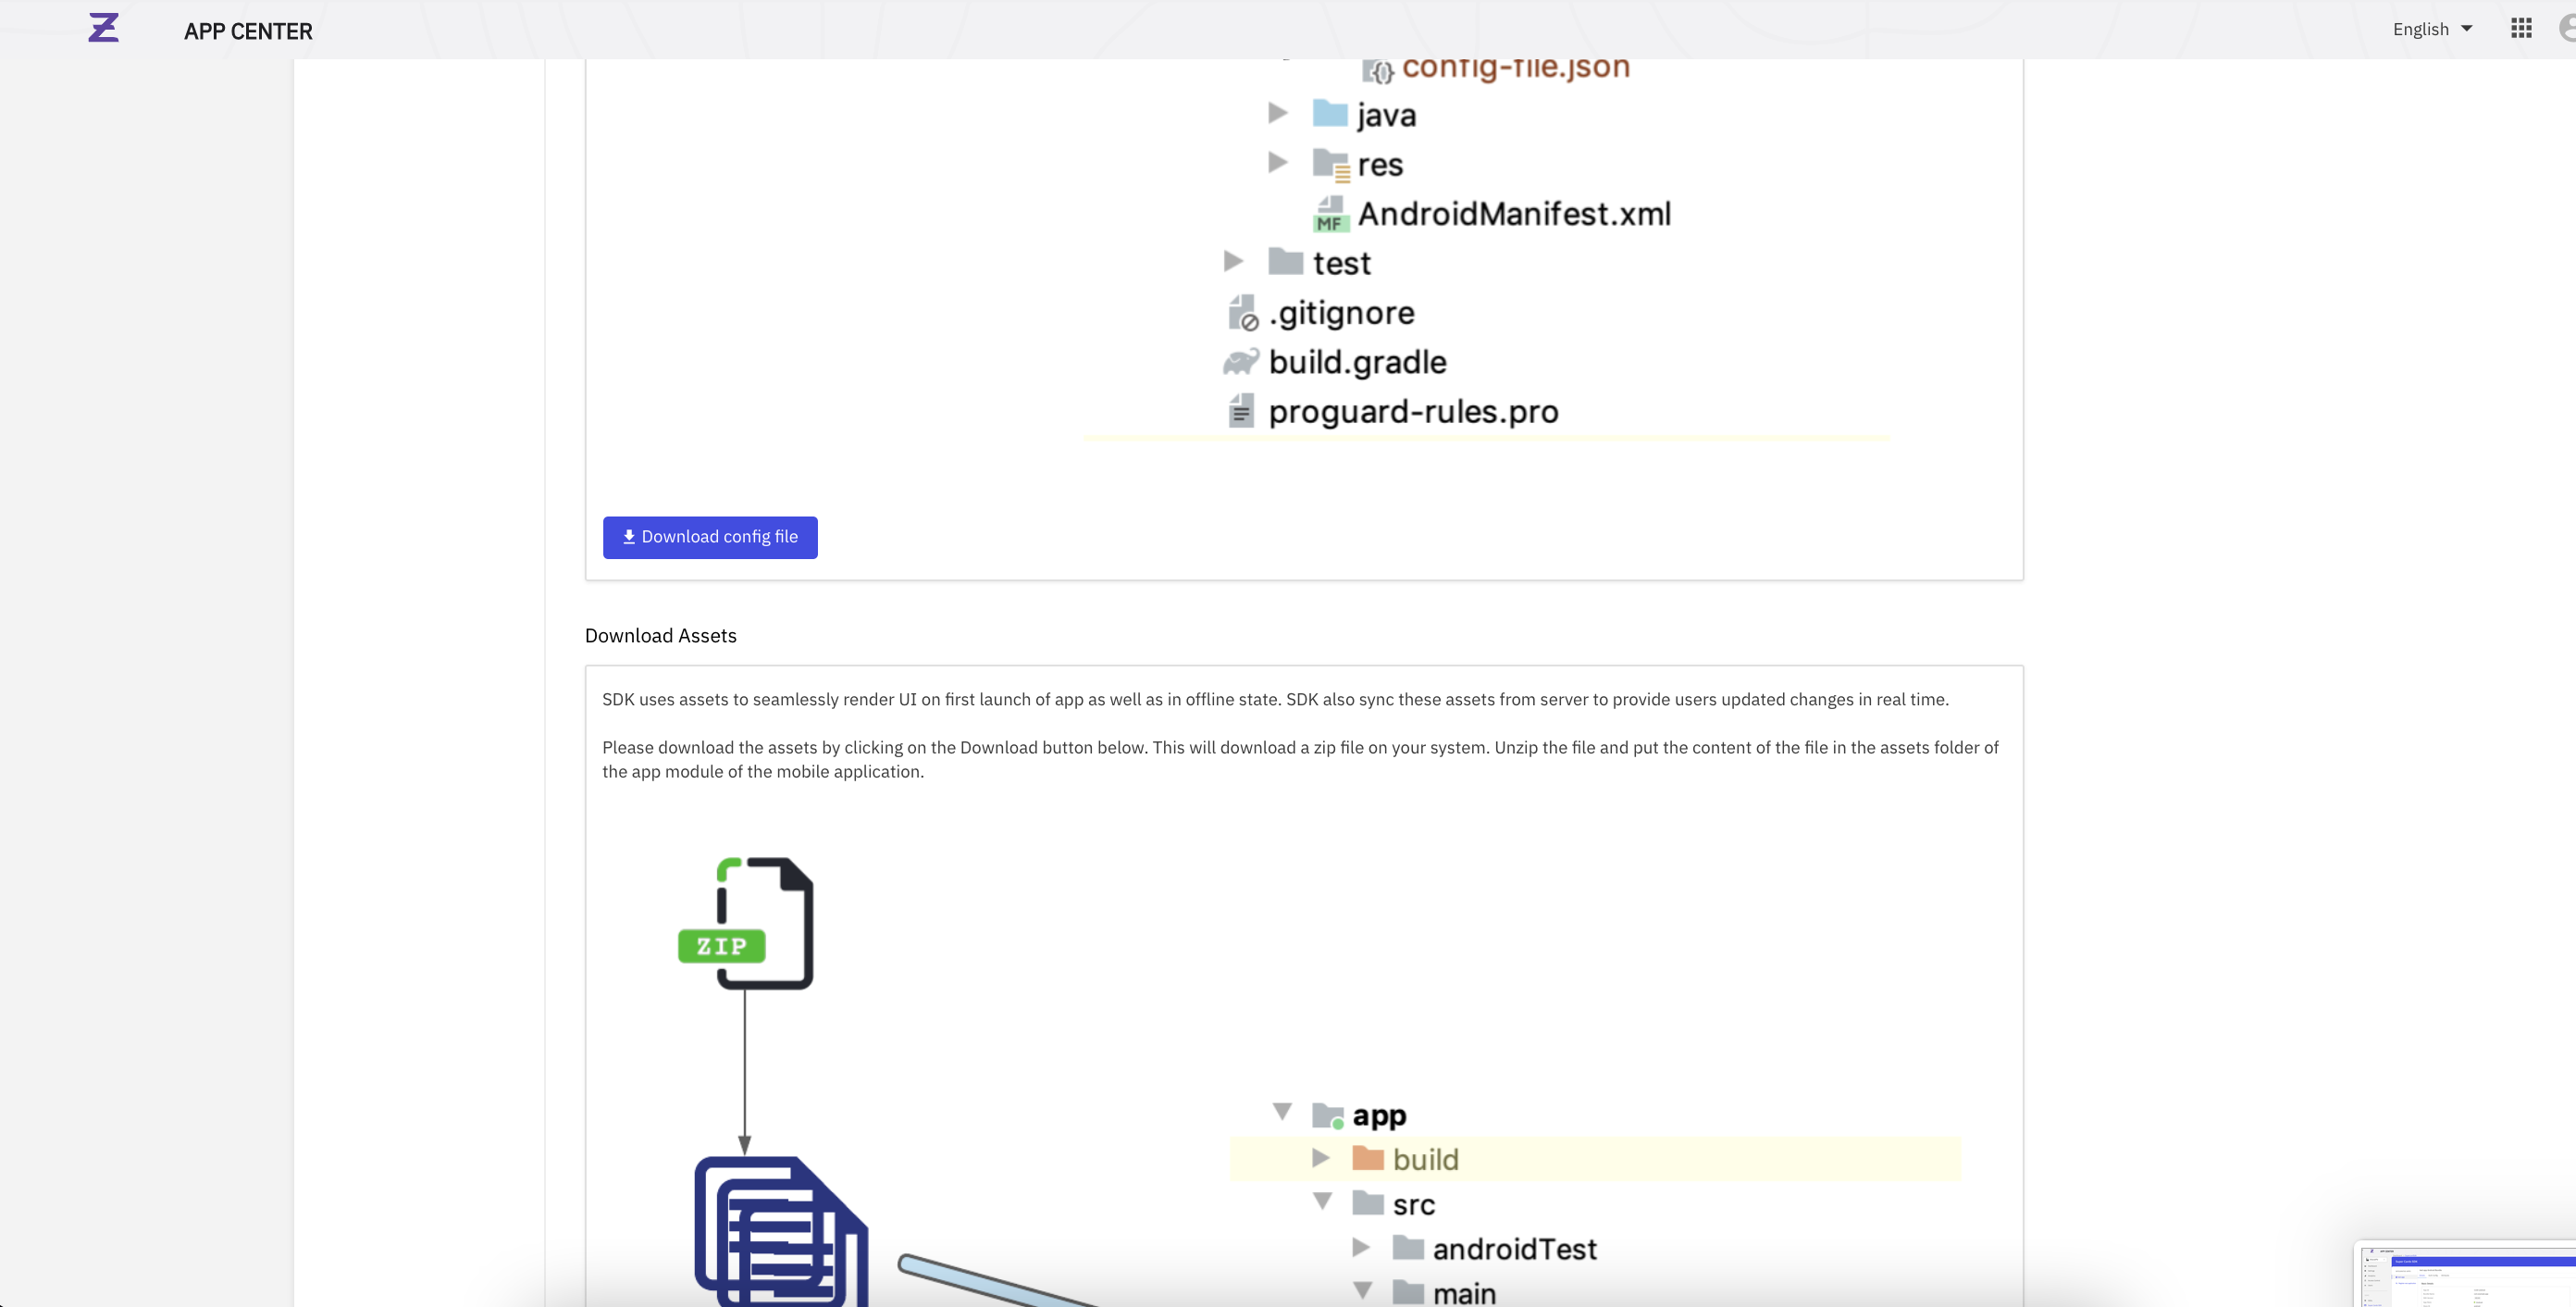
- Download asset (theme + template + currency) files
- Click “Refresh & Download” CTA to download the assets in a zipped folder, after a 3 minute timer complets.
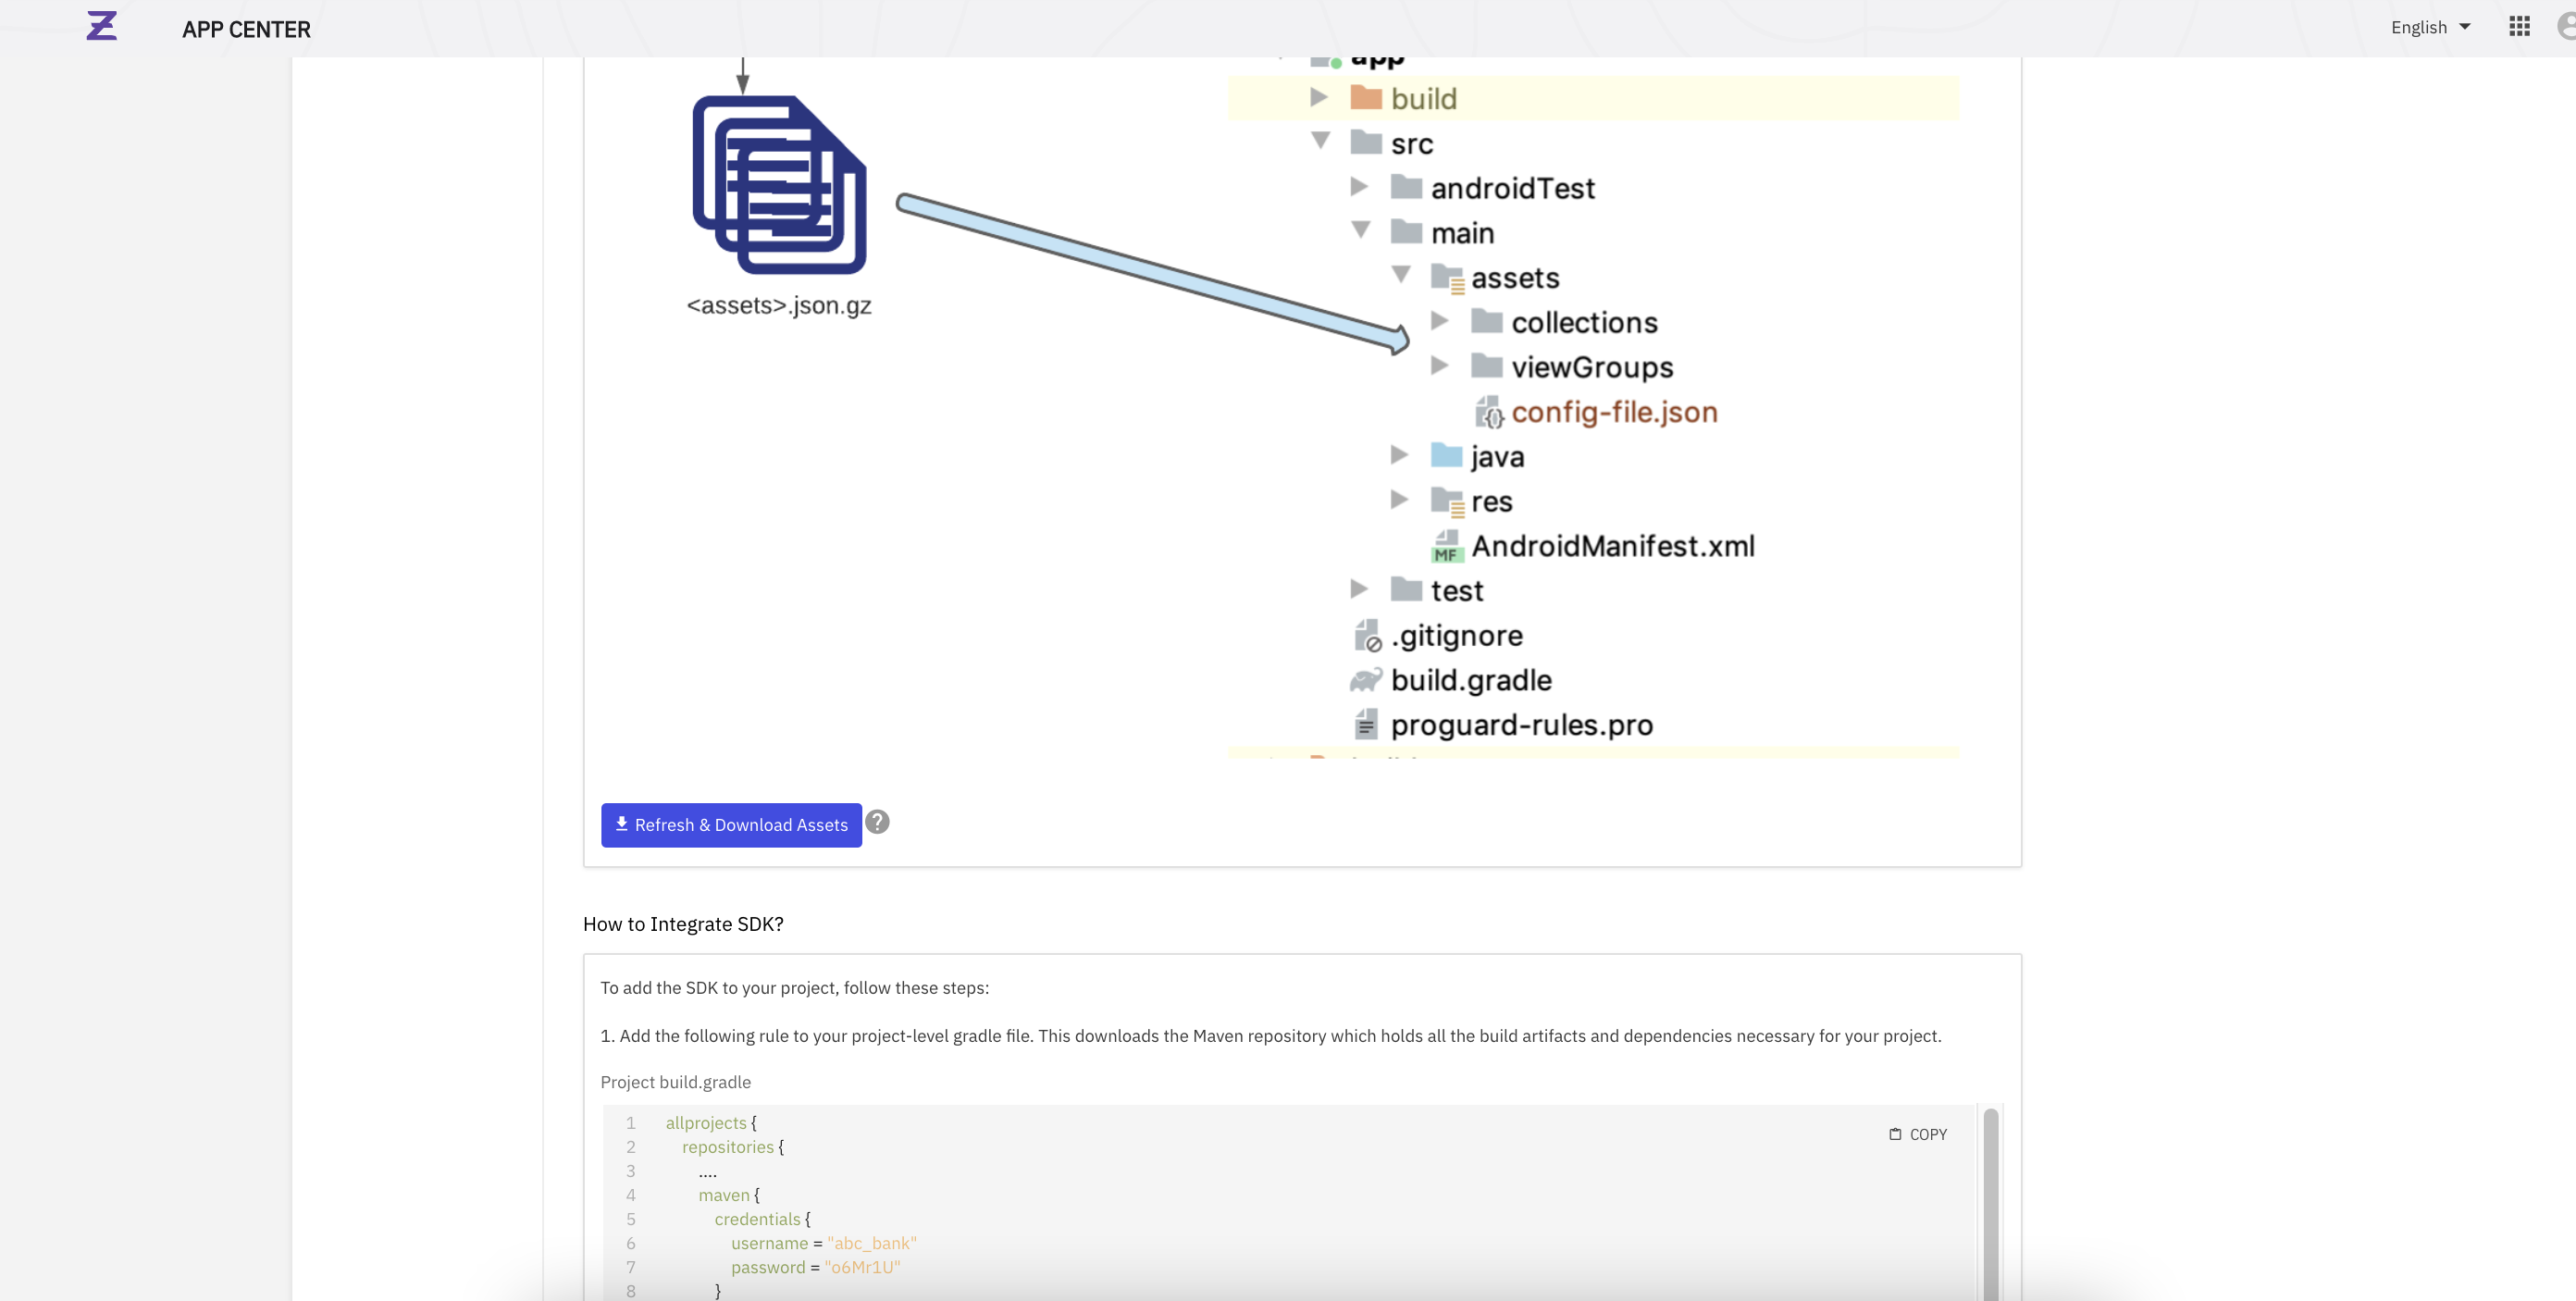
- Maven creds + dependencies
- Copy the code snippets for both the project & application level .gradle files. This contains the credentials for the maven repository for the SDK as well as the dependencies required in the application.

- Download config file
Step 6 : Settings page - developer tools section
-
This section will allow you to access links to the bitbucket repositories, Jenkins dashboard along with credentials required for accessing them.
-
Once you have successfully obtained the config file, assets folder & code snippets for dependencies from the SDK details page, visit the “Settings” tab on the left pane
- Head over to the “Developer tools” tab where you will find the following
- Bitbucket repositories for both Templates & Mario Configs
- Link to Jenkins dashboard for deployments along with user ID & password
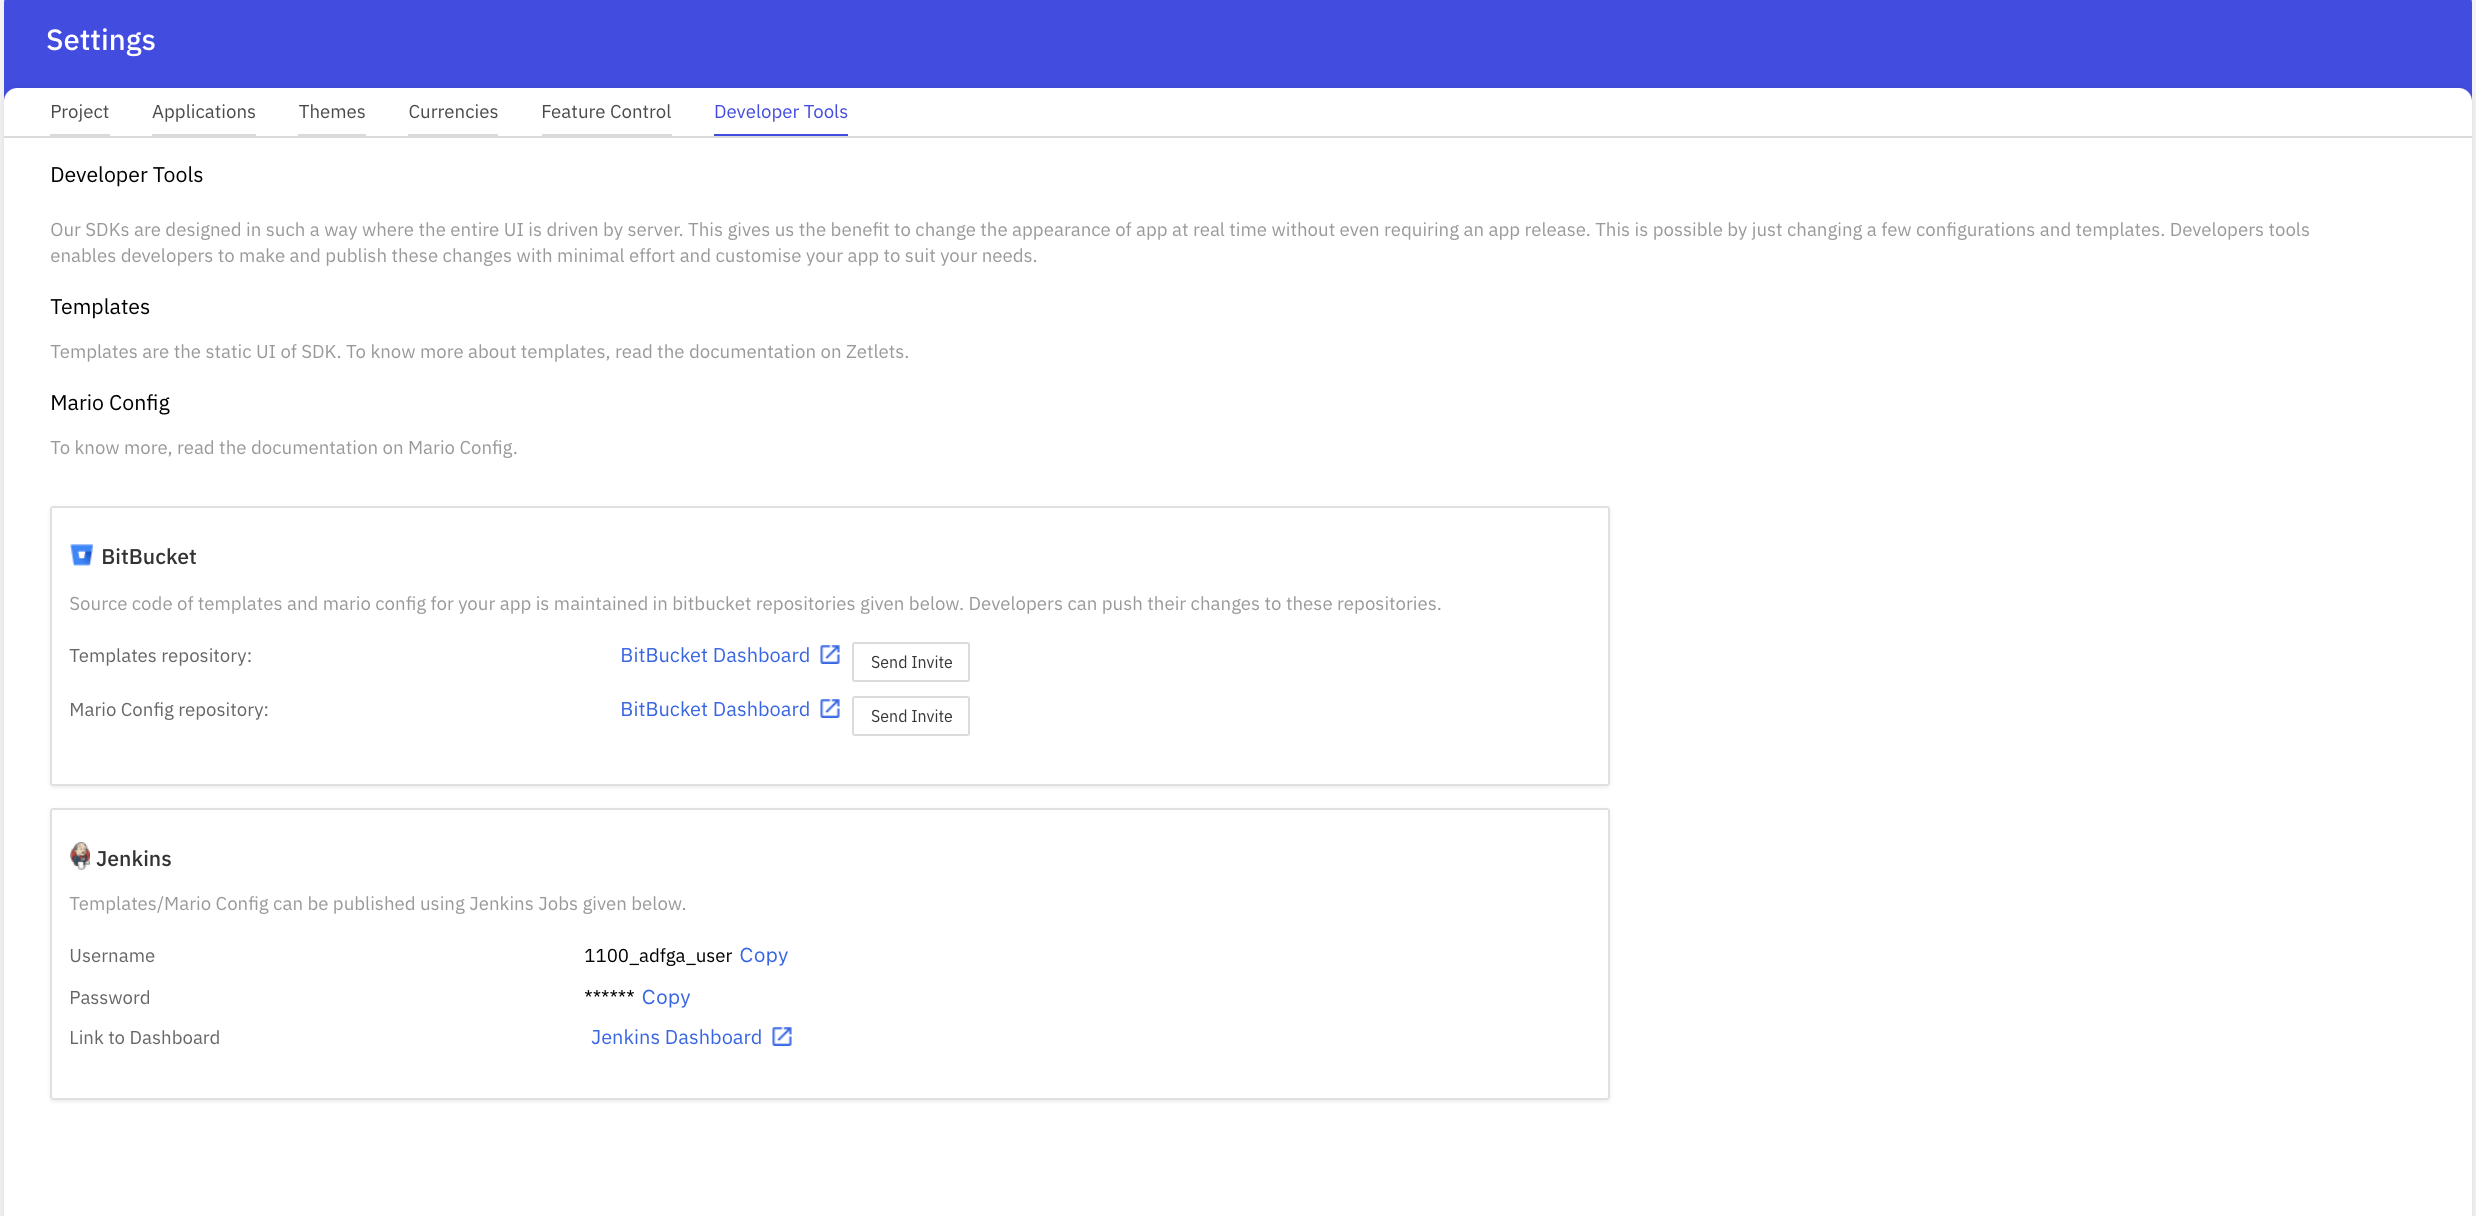
- Head over to the “Developer tools” tab where you will find the following
iOS SDK consumption via App Center
- Login to App Center once you receive an email saying it’s successfully been provisioned for you
Step 1: Project Creation
- Once you land on app center, Click “Create a Project”

- A project represents a collection of apps created by a tenant.
- Example - If a tenant has two different mobile applications. Eg: a benefits app and a merchant app; the suggested approach is to create two projects - Benefits App & Merchant App.
- Create a project in App Center by entering the following details :
| Field | Description |
|---|---|
| Project name | The name of the project |
| Project key | A unique key for the project |
| Project key | A unique key for the project |
| Repo key | A unique identifier for the repository |
| Description | A description for the project |
| Upload icon | Add an icon for the project |

- Click “Create” & “Continue” & wait for the 3 minute timer to complete for project creation.


- Once the timer completes, click “Go to SDKs” on the prompt.

Step 2 : SDK subscription
- The user must subscribe to an SDK (eg : supercard SDK etc.) for a particular platform (Android/ iOS) that they wish to use, after they’ve successfully completed the project
- Subscribe to cards SDK by clicking the “Get SDK” option on supercardsdk & select the platform

Step 3 : Application Registration
- Users need to have an application registered to subscribe to the SDK for consumption. Enter the following platform specific details for the application.
| Field | Description |
|---|---|
| Android/ iOS App name | The name of the application |
| Bundle name | Apps bundle name |
| Scheme name | The scheme used in their app |
- Click “Register & Proceed” & then “Continue” CTA and wait for the 3 min timer to complete.
- Once the timer for Registration completes, click “Go supercard SDK“ on the prompt. This will take you to the SDK details page.
Step 4 : Auth Config setup
- An auth profile has to be set up for the VBO to be able to authenticate the SDK & begin using functionalities that the SDK has on offer.
- On the SDK details page, click on the “Auth Config” tab
- Click on “Add Auth Config”
- Enter the following details (these details would be provisioned for you via email)
- Bank issuer ID
- Sandbox ID
- Sandbox role
- Domain
- Scope name
- Auth type : select Asymmetric JWT auth
- After selecting asymmetric JWT auth use the following API in postman to generate a set of public & private keys
- curl –location –request GET ‘https://apollo-sdk-auth.stage.zeta.in/apollo-sdk-auth/1.0/keyPair'
- Copy the public key & enter it in the “Public Key” textbox in the App Center.
- Click “Create” & wait for the 3 minute timer to complete auth profile setup
- The corresponding private key can be used in your code to sign the tenantAuthToken (JWT).
Endpoint URI for tenantAuthToken (JWT) generation
Example
Switch Theme
Expand More
Copy
curl --location --request POST 'https://apollo-sdk-auth.stage.zeta.in/apollo-sdk-auth/1.0/jwt/test' \
--header 'Cache-Control: no-cache' \
--header 'Content-Type: application/json' \
--header 'Postman-Token: b80e61a5-2b07-4b3f-87b5-396d3d78ecd1' \
--data-raw '{
"base64EncodedPrivateKey": "<privateKey>",
"claims": {
"tenantUniqueVectorId": "<account_holder_Id>"
},
"algorithm": "EC",
"issuerId": "xyztech",
"epochExpiryTimeInMilliseconds": 1661057459000
}Step 5 : SDK details page
-
This page summarises your SDK setup so far. It is where you will be able to download config, asset files, get code snippets with credentials, dependencies etc. as done in the existing integration document.
-
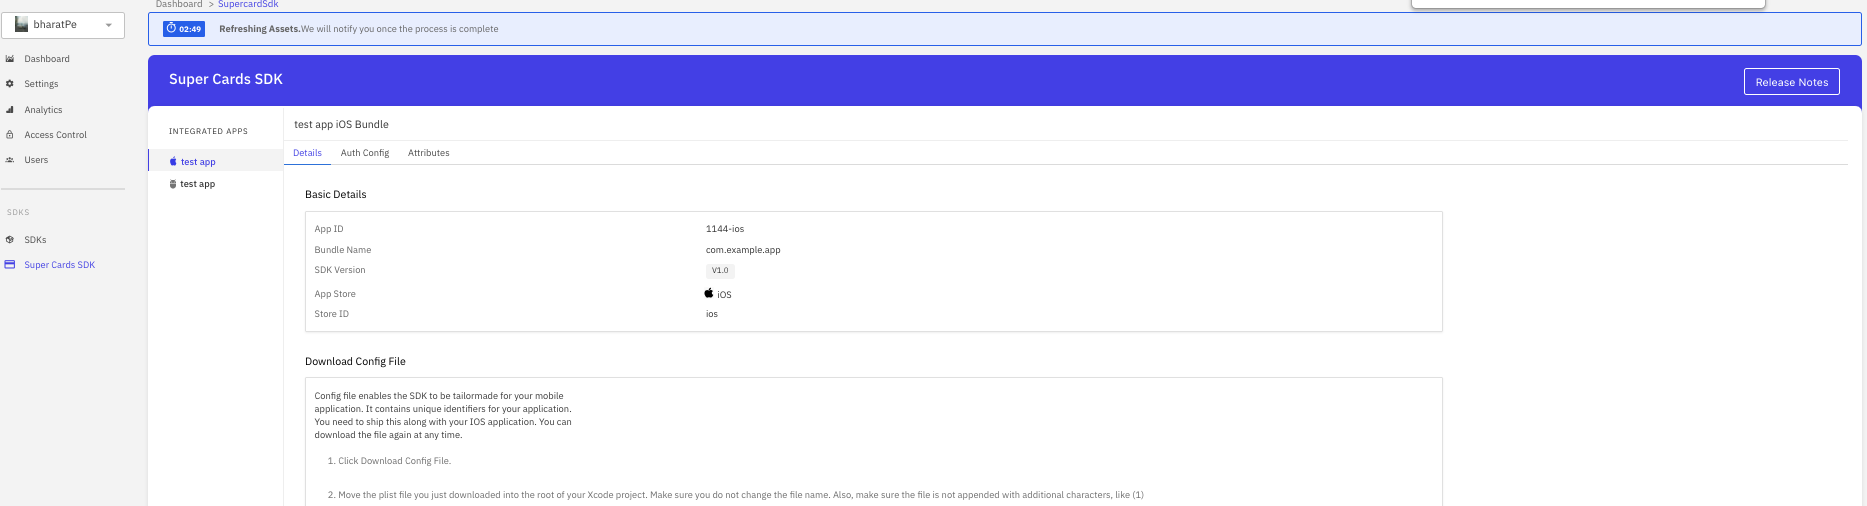
Once the timer for auth config setup complets, Navigate to the “Details” tab in the SDK page. Here you will be able to :
- Download config file
- Click “Download Config File” CTA to download the config file
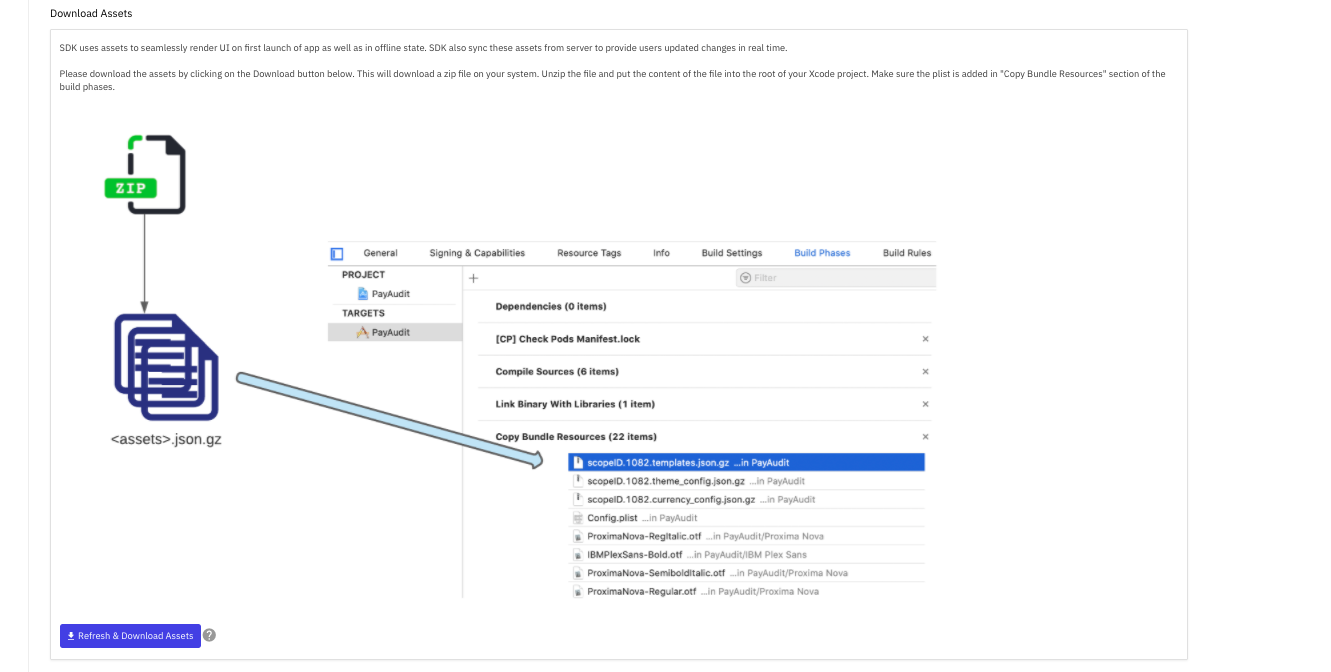
- Download asset (theme + template + currency) files
- Click “Refresh & Download” CTA to download the assets in a zipped folder, after a 3 minute timer complets.
- Extract the contents of the zip file and paste them in the location as shown in the screenshot.
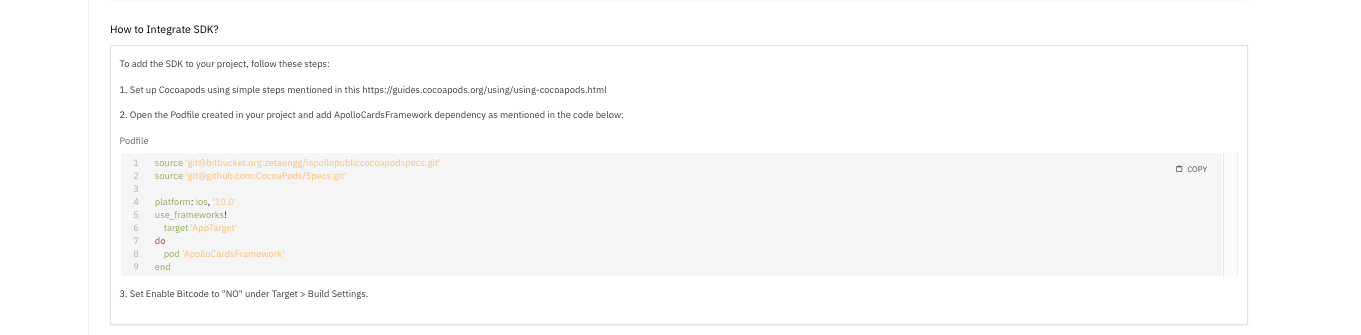
- Cocoapods dependencies
- Copy the code snippet for the Podfile as mentioned.
- Download config file
Step 6 : Settings page - developer tools section
-
This section will allow you to access links to the bitbucket repositories, Jenkins dashboard along with credentials required for accessing them.
-
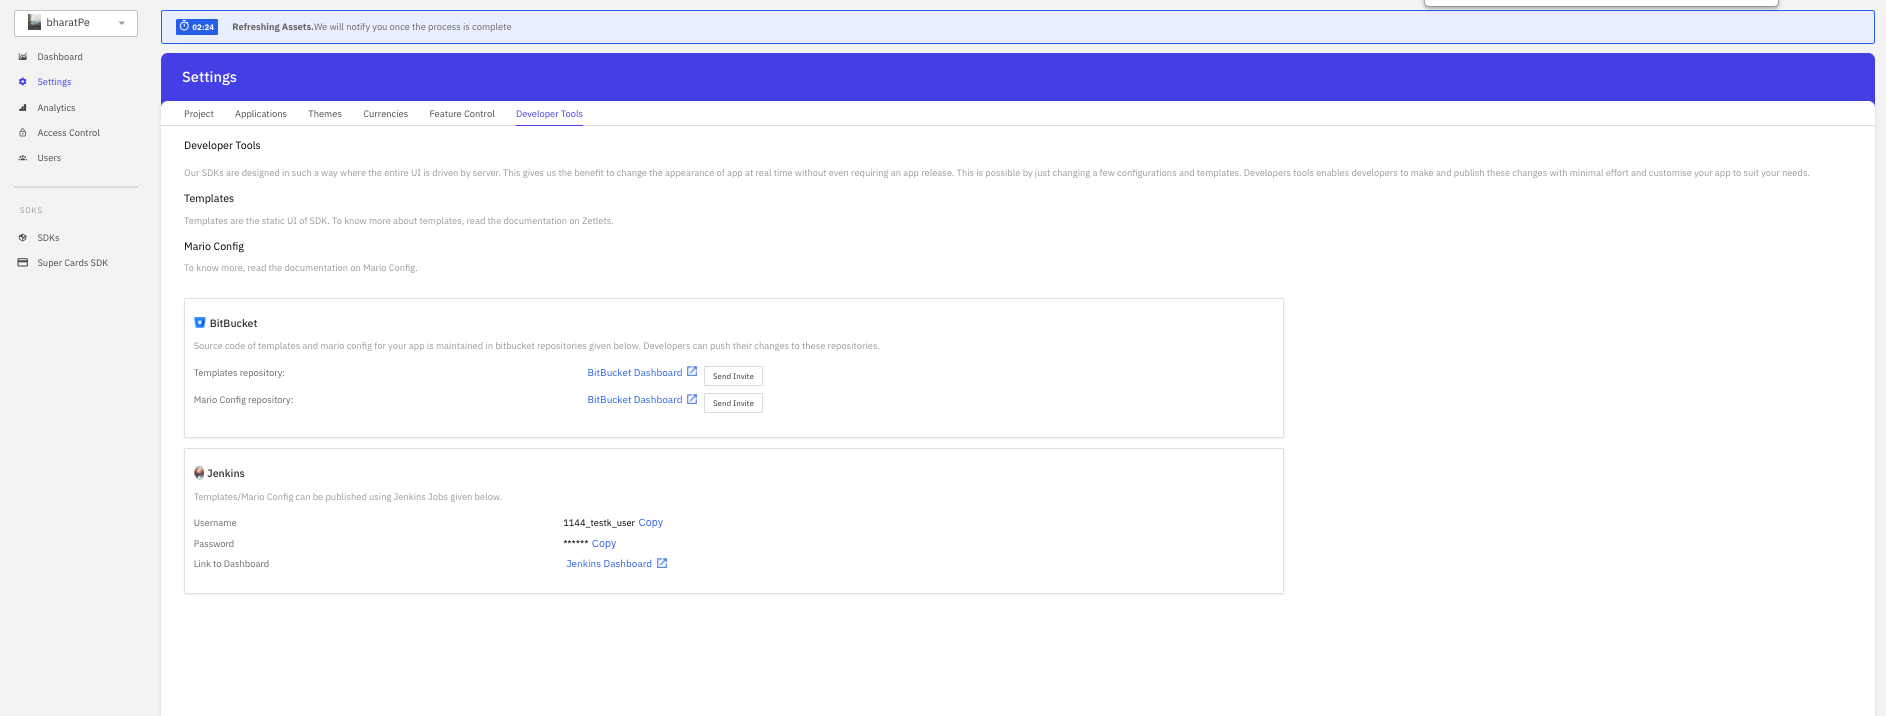
Once you have successfully obtained the config file, assets folder & code snippets for dependencies from the SDK details page, visit the “Settings” tab on the left pane
- Head over to the “Developer tools” tab where you will find the following
- Bitbucket repositories for both Templates & Mario Configs
- Link to Jenkins dashboard for deployments along with user ID & password
- Head over to the “Developer tools” tab where you will find the following