

Adding the SDK to your App
Please follow the steps below to successfully complete this step
1. Adding the SDK
The iOS Card SDK is compatible with apps supporting iOS with version 10 and above. To add the SDK to your project, follow these steps :
-
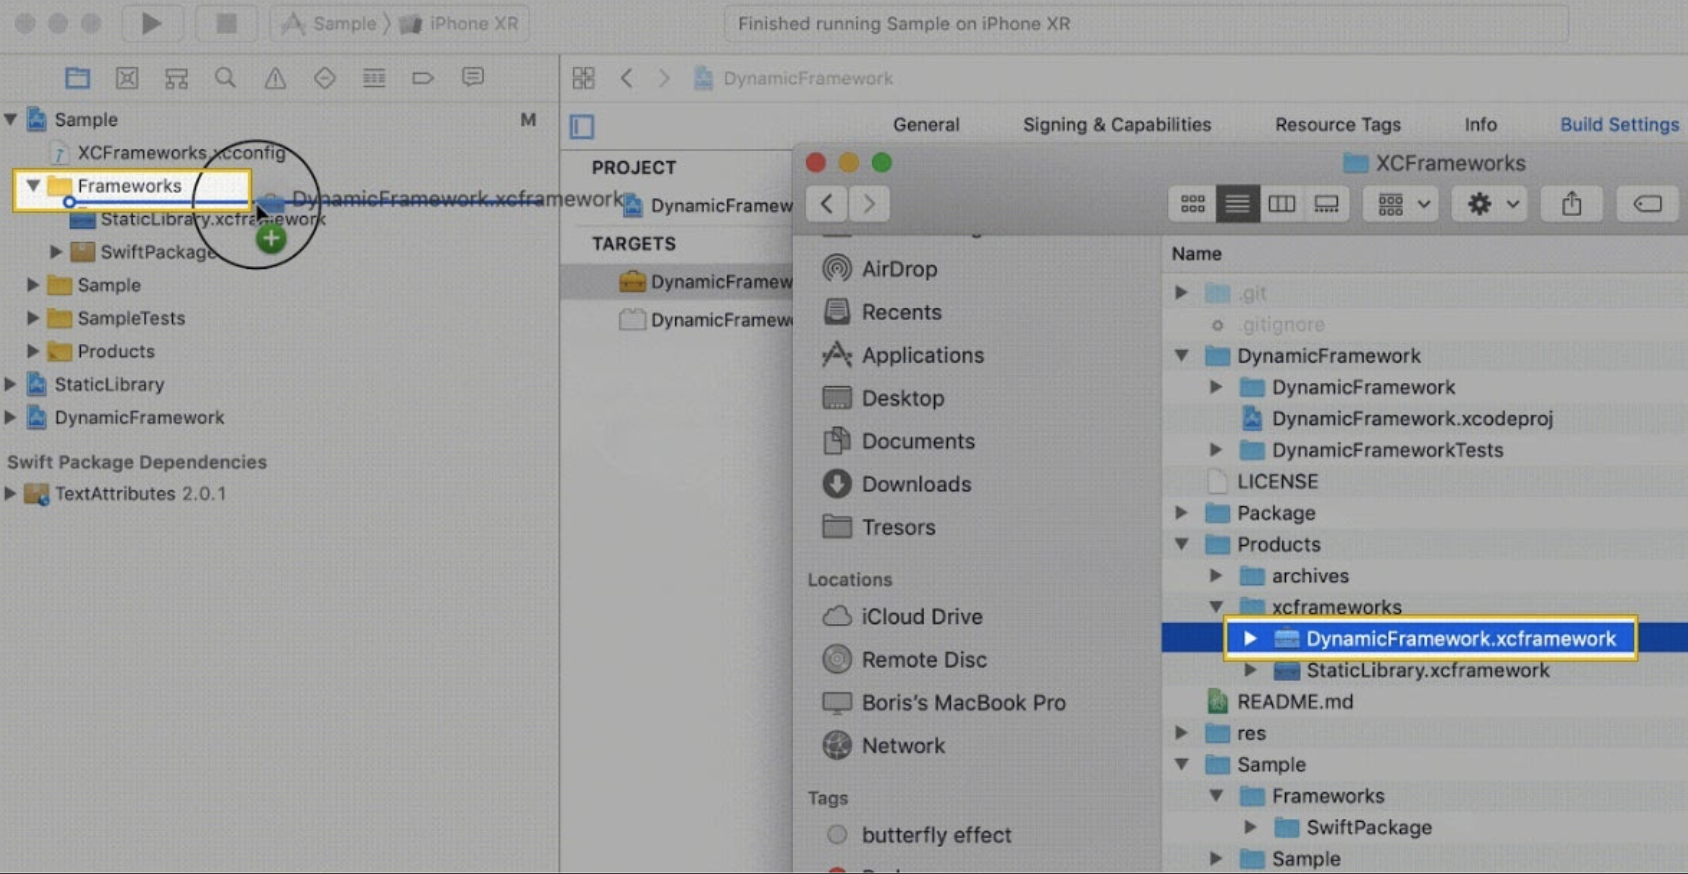
Download and extract the zip folder containing an
XCFrameworkfor Card SDK from here. -
Drag & drop the framework file you just downloaded into your projects target
-
Click Embed & sign under the
XCFrameworkin your project’s target. SetAllow Non-modular Includesin Framework Modules to YES underTarget > Build Settings. SetEnable Bitcodeto NO underTarget > Build Settings.
2. Setting up the SDK
-
Adding configuration files A configuration file contains all the properties necessary for activating the SDK. You should add the file to the main target of your project to prepare your app to work with the SDK. You will receive the configuration file named
supercardSdk.plistthrough email. If you haven’t received the file, contact Zeta Support. -
Adding theme & template files Card SDK provides you with the capability to define the theme and layout used by the SDK. These can be edited remotely so you won’t have to ship a new app build for changing how your view looks. You can change your theme by contacting Zeta and it will reflect on your app on the next launch.
-
Configure properties To enable authentication using face recognition (Face ID), add a value to the
NSfaceIdUsageDescription(Privacy - Face ID Usage Description) with a message in theinfo.plistfile.
3. Initialize the SDK
Create the ApolloCardManager instance in your AppDelegate file. Initialize it inside the applicationdidFinishLaunchingWithOptions: method of your Applicationclass. Keep the instance for ApolloCardManager globally accessible.
Sample cURL

 Switch Theme
 Expand More
 Copy
Copy
|
|
 Code Copied
 4. Integrating the SDK
Card SDK is a stateful SDK. Before you start using the Card SDK features, take care of the following :
- Authenticating the SDK
For a user of your app to be able to use the cards SDK through your app, you need to authenticate the user with the tenantAuthToken. The tenantAuthToken needs to be computed in your backend as it needs sensitive information to create the token. The information used to generate the tenantAuthToken should never be compromised.
Set the tenantAuthToken to the cards SDK once the user logs into your app and you have sufficient information to issue a tenantAuthToken for the user. More information here on how to generate the tenantAuthToken can be found
here. Following is a code snippet on how to authenticate the SDK :
Sample cURL
Switch Theme
Expand More
Copy
|
|
Code Copied Note: This step has to be performed in a fresh log-in of the user or when the earlier provided tenantAuthToken expires.
Note: A tenantAuthToken has an associated validity with it. The ideal practice is to reset a new token before it expires.
- Setting up the SDK
Note: Ensure that this step is performed only after you have SDK authentication in place
- Basic setup
This step has to be performed on every launch of the app (post the authentication of the SDK). You can perform this inside the onCreate() method of your launching activity.
Sample cURL
Switch Theme
Expand More
Copy
|
|
Code Copied - Advanced setup For storing the card details and authentication information securely, we use encrypted storage and hide the data behind the user’s authentication. If you are an issuer, you can provide a custom implementation of your own encrypted storage. This is how you can achieve it :
Sample cURL
Switch Theme
Expand More
Copy
|
|
Code Copied Listen to the listener for success. You can access the Cards SDK APIs post that.